Since the Poser virtual world can’t be filled with objects to infinity, I’ve got two ways to define the far away portions
- A background shader – this chapter
- A defined object with a color or texture (usually a photograph) attached – next chapter
The background shader
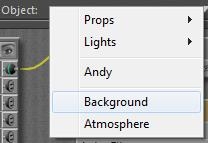
As light rays travel from all lights via all objects onto the view plane of the camera, some pixels will hardly, or never, get lit. This is where the “background shader” kicks in, and fills the emptiness. The Poser background shader can be set for the Background notion in the Materials Room. Background is not an object, like the atmospheric Volume is not an object either.
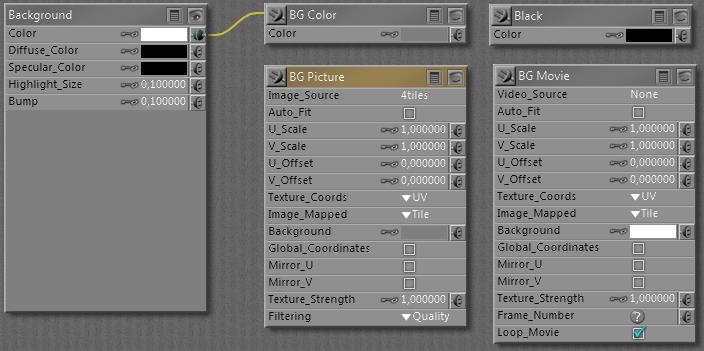
The actual working of the elements is a bit confusing, as you can see there are
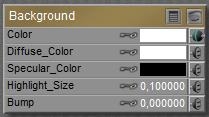
- The “Current BG Shader” of Background root node (root nodes don’t have an output connector at their upper left)
- The BG Color node
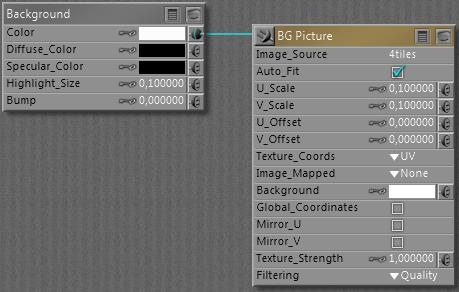
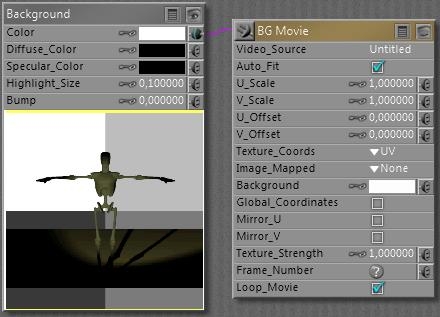
- The BG Picture and BG Movie node
- The Black node
Now I’ve got the Preview and the Render, and the question: which one is showing what?
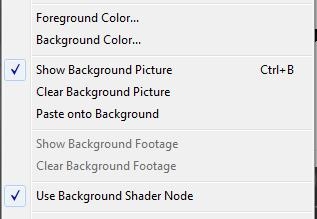
The Preview is arranged for in the Display menu:
When an image is loaded into the BG Picture node, either by assigning one as the Image_Source parameter or by loading one via the Import \ Background Picture menu option,
the Show Background option in the Display menu becomes available. That is: the BG Picture node should be connected to the Color parameter of the Background node. Then, when the menu option gets checked, the picture is shown in the preview. The image, and hence the content of the Image_Source parameter in the BG Picture node can be deleted by using the Clear background Picture menu option.A similar scenario holds for displaying a movie in the preview: load one in the Video_Source parameter of the BG Movie node, or import one via the Import \ AVI Footage menu. The Show Background Footage option becomes available and can be checked. Again: the BG Movie node should be connected to the Color parameter of the Background node.
When nothing is checked, or the checked Picture / Movie option is not connected to the Background node, you’ll get the BG Color node contents in the preview, whether it’s connected to the Background node or not.
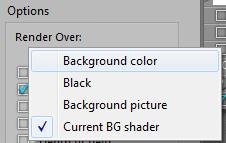
The Rendering is arranged for in the Render Settings:
The first three options pick the contents of the BG Color, the Black and the BG Picture node, the latter has to be connected to the background node’s Color parameter. The last option: Current BG Shader, picks up whatever is connected to the Color parameter, and multiplies with that color swatch too!
Again:
In Material Room I’ve got the background root node, and four basic nodes: Black, BG Color, BG Picture and BG Movie. I can connect any of these to the Color channel of the Background node.
In the Display menu, I’ve got options like Show Background Picture, Show Background Footage and Use Background Shader Node. Only when the BG Picture node is connected with Background, the Show Background Picture option becomes available to turn showing the background picture in the preview on/off. Only when the BG Movie node is connected with Background, the Show Background Footage option becomes available to turn showing the background movie in the preview on/off. The Use Background Shader Node menu option has not shown any effect on anything up till now. Sorry for that.
From the File menu, I can Import either a background picture or background footage. When importing Background Picture, Poser loads the BG Picture node, connects this node with Background (hence dims the Show Background Footage option) and switches Show Background Picture to ON. When importing Background Footage, Poser loads the BG Movie node, connects this node with Background (hence dims the Show Background Picture option) and switches Show Background Footage to ON.
Do note that I can set the BG Color from the Document panel directly, using the (second) color-swatch option at the bottom-right. So, for handling backgrounds, I don’t have to enter Material Room at all.
In Render Settings, I can select the render background almost independent of my choices for Display, or the node-connections in Material Room. That is: I can render against Black or Color even when the preview is showing Picture or Footage, with Picture / Movie node connected and the Display menu option switched ON. I also can render against Picture or Footage while the preview is not showing it, having the Display menu option switched OFF. But in order to use Picture or Footage in either preview or render or both, the corresponding node must be connected to Background in Material Room. To the Color swatch.
The other way around: how to rotoscope against a movie.
First, I go File > Import > Background Footage. This will load the BG Movie node, connect it to Background en switch ON the Show Background Footage option in the Display menu, so the footage will be visible in preview.
Then, in Render Settings, I have to select Render against: Background Picture (or Current BG Shader), and the footage will appear in the render results as well. That is: provided I use a save / export format without transparency: a series of PNG’s will not show any background anyway!!
