What are the User_defined, Simple_color and Colorramp nodes used for?

Nodes are the essential building blocks in the Advanced interface to the Poser Material Room. They are the graphical representation of mathematical function calls, that is: calculation procedures which turn parameters (inputs) to a result (output).

Advanced

The Math group offers various nodes that can adjust and combine colors, images and other texture elements. This article discusses:

  • User_defined
  • Simple_color
  • Colorramp

which generate colors from value inputs. See for the overview of the Math group.

User_Defined
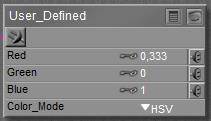
This node produces a color, that is: a three value RGB vector with each component between 0.0 and 1.0, from three independent input values.

When Color_Mode is set to RGB, the input values are just clipped to the 0..1 range and passed through. In the HSL or HSV modes, the inputs are clipped into the 0..1 range as well, and then translated to RGB colors. For instance, Hue=0 (or 1 or 2 or …) implies Red, Hue = 0.5 implies Cyan, Hue = 0,333 is Green. The input called Red contains Hue, Green contains Saturation and Blue contains Lightness or Value respectively.

In the HSL model, the Saturation starts at 0 with grey and mixes more and more pigment into it, until it’s saturated at S=1. The taint of grey is determined by the Lightness: 0 for full black to 1 for full white. So full red requires (0,1,any) for input. In the HSV model, Saturation determines the mixture with White (0 = white, 1 = full pigment) while Value determines the mixture with Black (0= black, 1 = full pigment). Full red requires (0,1,1).

Note: a color generated by this node will not be image-driven or color swatch-driven, but value-driven. As a consequence, it will not be pre-adjusted when renders are done with Gamma Correction ON (Poser 10, or Pro all versions), and results will look brighter than for color swatches representing the same color.

Simple_Color

This node produces… a simple color, as set by a color-swatch. Or a simply color-filtering of anything inputted to it.

This is useful when a single color is used multiple times in a materials node tree. Now it can be defined once and managed at one place. It’s simpler than using the User_Defined node, which requires three independent input values for R,G and B separately.

But there is another serious difference: when rendering under Gamma Correction, as available from Poser 10 and Pro 2010 and up, all color swatch defined colors are affected, but numerical settings as from User_Defined are not. This might give different results for a same color, when set in different ways.

Colorramp
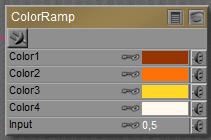
This node produces a color from a four-point gradient, having the color-points set at 0%, 33%, 66% and 100%. The interpolated color is derived from the Input value, which should be between 0.0 and 1.0. I can plug in a greyscale image in here as well, to get it colored up.

Note: when rendering with Gamma Correction, the swatches will be pre-adjusted (darkened) but each at a different rate, and the Input-value will not. As a consequence, the resulting hues produced by this node will differ, depending on whether GC is used or not. See this article for details, and for eventual solutions.
Next >

What are the Component and Math_functions / Color_math nodes used for?

Nodes are the essential building blocks in the Advanced interface to the Poser Material Room. They are the graphical representation of mathematical function calls, that is: calculation procedures which turn parameters (inputs) to a result (output).

Advanced

The Math group offers various nodes that can adjust and combine colors, images and other texture elements. This article discusses:

  • Component
  • Math_functions
  • Color_math

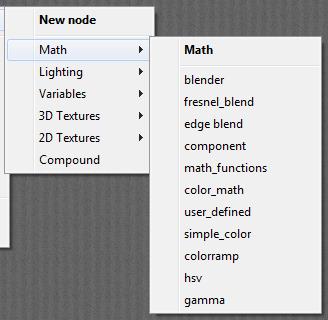
which split and combine value or color / image inputs in a mathematical way. See this overview of the Math group.

Component

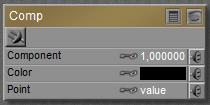
This node accepts a vector, either representing a color (Red, Green, Blue) or a pointer in space (Variable nodes, like P,N and dPdu etc.). From that vector it picks the first, second or third Component (using values 0, 1 or 2 for that) and presents that value as a result.
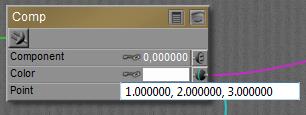
How do the inputs work together to make an output?

  • When something is plugged into the Color slot, that takes precedence over anything else. The input is filtered (multiplied) by the color swatch, and the appropriate component of that RGB value triplet is passed through. All Point information is ignored.
  • When nothing is plugged into the Color slot, but something is plugged into the Point slot instead, the appropriate component of that input is passed through. The Point value and the Color swatch are both ignored.
  • When nothing is plugged into any slot, the appropriate component of the Color swatch is passed through, the Point value is ignored, unless…
  • Nothing is plugged in and the Color swatch is complete black (0,0,0),then the appropriate component of the Point value is passed through. Note that this value is a value triplet (point vector) of some sort.

Math_Functions and Color_Math

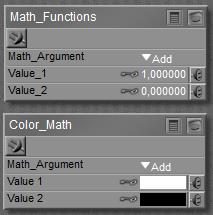
Both nodes produce a result from a math operation on two inputs. They both offer the same list of choices for such operations. The difference between them is:

  • Math_Functions produces a single value, and turns every input into a single value as well before the operation is performed. So, when I offer it a color or a pointing vector, that is turned into a value first (for colors: the brightness it calculated and used). The math is performed as one might be familiar with, just using function calls or performing algebra and the like.
  • Color_Math produces a three-component vector, based on such color- or pointing vectors for input as well. Single values are turned into a vector with three equal components, like a value is turned into a greyscale tone. The math is performed on a per-component basis, that’s the Math_Function operation three times:
    • Result 0 = math operation on inputA comp 0 and inputB comp 0
    • Result 1 = math operation on InputA comp 1 …
    • Result 2 = …

Most functions do what I can expect from them, as defined by any basic math textbook. See the Poser Reference Manual on them in case of doubt. Some operations need both inputs (like Add and Multiply), other operations work on Input_1 only (like sine, square root).
The Smoothstep, Bias and Gain operations expect an image for Input-1. Smoothstep then will perform the bicubic enhancement which is about standard when an image is resized and resaved in my imaging software. Bias and Gain expect a value (or three-value vector) for Input_2 as well, and will adjust image brightness (Bias) and contrast (Gain) accordingly. The value 0.5 is considered neutral (no net effect), lower values (down to 0) reduce brightness/contrast, and higher values (up to 1) increase them. Negative contrasts will invert the image input.

Note that all images and all color swatches can be affected by the Gamma mechanism (Poser 10, or all Pro versions) at render time, and hence the outcome will be affected as well, unless explicit measures are taken to prevent that.  Images should have their Gamma value set to 1.0 and swatches should have brightness 1.0 (that is: at least one color component should equal 100%).

Next >

What are the Math nodes used for?

Nodes are the essential building blocks in the Advanced interface to the Poser Material Room. They are the graphical representation of mathematical function calls, that is: calculation procedures which turn parameters (inputs) to a result (output).

Advanced

The Math group offers various nodes that can adjust and combine colors, images and other texture elements.
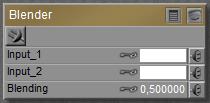
In this article, and some following ones, these nodes are discussed in subgroups. In this article:

  • Blender
  • Fresnel_blend
  • Edge blend

which mix two color, image or texture inputs into one result. In the next article:

  • Component
  • Math_functions
  • Color_math

which split and combine value or color / image inputs in a mathematical way. In the article after that:

  • User_defined
  • Simple_color
  • Colorramp

which generate colors from value inputs, and in the last article on Math nodes:

  • Hsv
  • Gamma

which modify image characteristics like brightness and saturation.

Blender

This node takes two inputs, color or image or whatever, and blends them together. When the Blending value equals 0 the result is entirely Input_1, when the value equals 1 the result is entirely Input_2, and the real blends are made by intermediate values.

Of course, for static Blending values there are other ways of combining colors or images. But the power of this node is that the blending can be made dependent from space and time, by feeding any node from the 2D Textures (a pattern or blending image map), 3D Textures (a fractal) of Variables (U, V, framenumber) into it. Note than when an image-map is attached, this one should have its Gamma value set to 1.0 explicitly (Poser 1 or any PoserPro), to prevent the Gamma mechanism from interfering with the blending ratios.

Edge_Blend

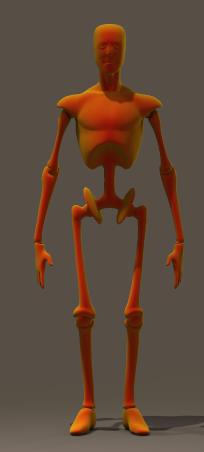
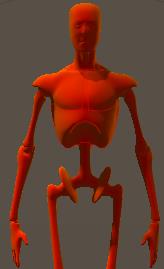
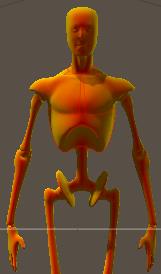
This node blends two inputs depending on the angle between the surface and the camera. When the camera looks straight (perpendicular) upon the surface the Inner Color will show, and at the edges, at skew angles towards the camera, the Outer Color shows.

makes

When I take a 2D perspective on the result, the edges are “out” and the area between the edges is “in”. I can also take a more volumetric approach; the more I look upon the middle portion the more transparent an object will be and the more I’ll see from the Inside, while at the edges I’ll see more of the surface itself, the Outside. Both give me a handle on the meaning of Inner and Outer Colors.

The Attenuation drives the (exponential) transition function. At minimum 0.0 no outer color will show, but at increasing values the edge effect will become apparent:

At 0.1:  and at 0.9:

Edge blends make velvet effects, and make more realistic transparencies and reflections (the Fresnel effect).

Fresnel_Blend

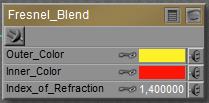
Since Edge_Blend was used frequently to approximate a Fresnel effect, additional nodes were added to recent Poser versions to help users out. One of those is Fresnel_Blend, which also takes Inner and Outer Color and an appropriate Index of Refraction (IoR). Instead of the (exponential) transition offered by Edge_Blend, the actual Fresnel function is used.

This Fresnel effect in real life concerns the balance between Reflection on one hand (high at the edges) and Refraction (with embedded Transparency, low at the edges) on the other hand. So combining Fresnel_Blend with those respective nodes is an obvious thing to do. For that reason, an explicit Fresnel node is offered which offers exactly that. Real-life IoR values can be found here.
Unfortunately, all those reflections and refractions are very computation intensive, and require vast amounts of render time. When I want to compromise, to cheat, to take shortcuts, then this Fresnel_Blend node can offer a nice way out. And when I like to make things even more complex, like combining reflections with specularity and assign Fresnel to this combination, or when I want to get Fresnel effects into the PoserSurface Transparency itself. Then I need this Fresnel_Blend node as well.

Next >

What are the curvature (dNdu, dNdv) nodes used for?

Nodes are the essential building blocks in the Advanced interface to the Poser Material Room. They are the graphical representation of mathematical function calls, that is: calculation procedures which turn parameters (inputs) to a result (output).

Advanced

The nodes from the Variables group tell me about the position, in space and time, of the spot that the PoserSurface definition is constructed for. There are two kinds of results from these nodes:

  • Single values.
  • Three value ‘vectors’. Like a color is defined by (Red, Green, Blue), so is a point in space defined by (X,Y,Z) and so on. These are discussed in previous articles on place P and normal N, and on stretching dPdu, dPdv, and in this article (curvature dNdu, dNdv)

The four Variables mentioned last tell us about the shape of the object, and the mapping that comes with it. The last two of these, dNdu and dNdv, look at variations in the surface Normal. When that varies a lot in a small step in U or V direction, it means that the surface is much curved. When it hardly varies, and all components of such a vector are close to 0, the surface is pretty smooth and flat. Yes, curvature is a vector too. I might have a lot in one direction, and hardly some at another. Do note that curvature is not slope. Slope is indicated by the normal at the point of interest, curvature is the rate of change in that slope.

Visualization

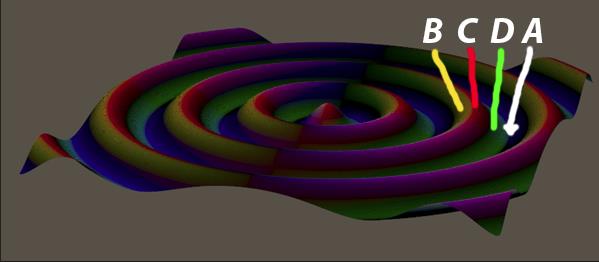
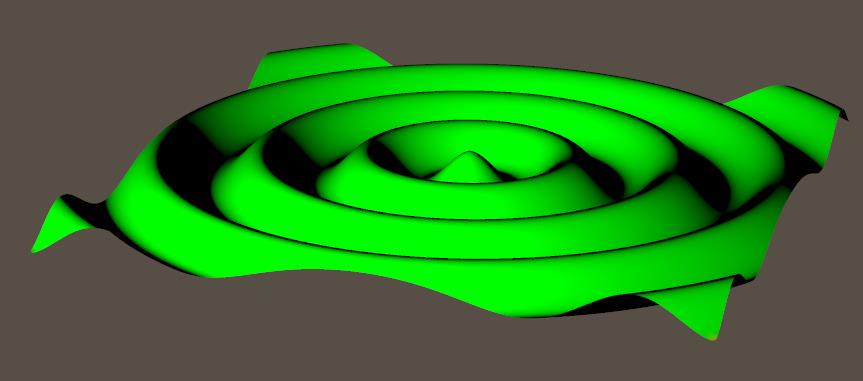
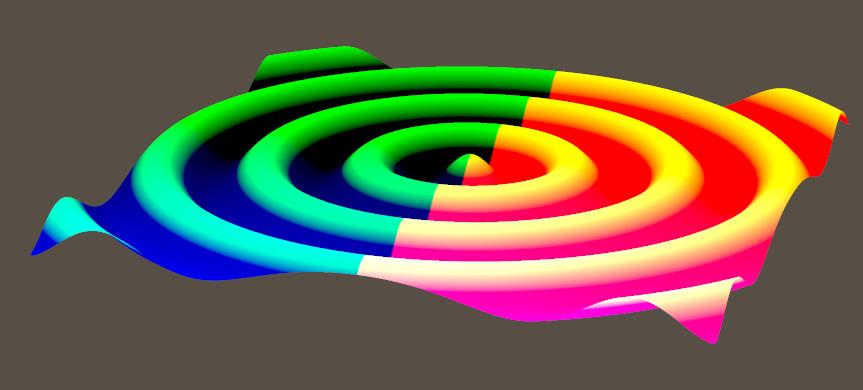
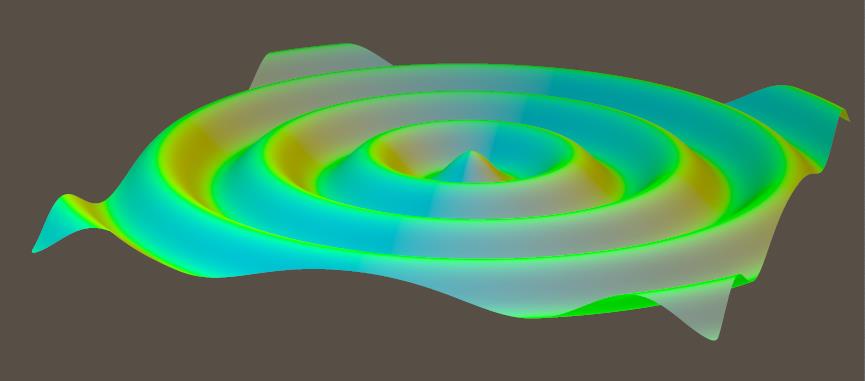
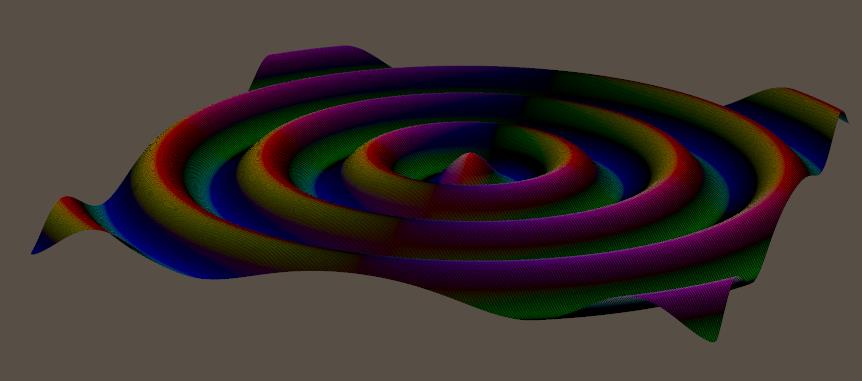
These renders show dNdu, translated to colors:

When it’s much curved, the colors are intense. Just before and after the tops, and just before and after the valleys. When it’s straight, either skewed or flat, the colors are mixed and dimmed. At the top and in the valley, but also halfway at the flanks.

Why do we get those colors? Let’s take the first case, start in the middle and gently walk to the right, the positive U direction. All normals will point up then, with no inclination forward or backward. This implies that two adjacent normals will have the same Z-value (being 0.0 in this case), so any difference between them will be 0 in Z-direction. When the resulting XYZ vector then is interpreted as a RGB color, it will show no Blue. For walking in that positive U direction, that is.

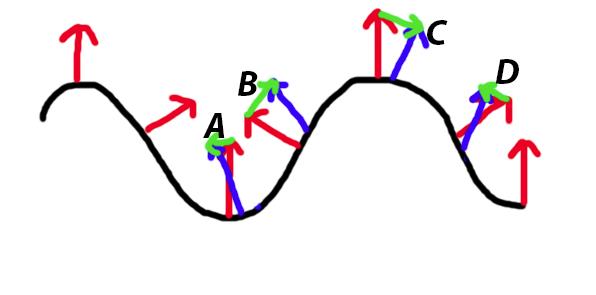
Meanwhile, the normal vector is UP at the lowest position, then leaning backwards (X negative, Y positive) when going uphill, then going straight UP again at the highest position, then leaning forward (X positive, Y positive) when going downhill, and then straight UP again. See the red and blue vectors in the illustration below:

The blue normals are exaggerated a bit, to illustrate the next point: while walking over the top half of the hill (B and C), the normal will lean less backward (B), and then more forward (C). So the difference (green arrows) between those adjacent normals is upwards to the right (B) and then downwards to the right (C). But while walking over or into the valleys (A and D) the normals lean backward more and more. So the differences between adjacent normals is to the left, downwards (A) or upwards (D).

Translating this to colors, what can we expect?

A. downwards left: negative X (left), negative Y (down) and zero Z. The negatives are clipped to 0 when turned into colors, so the result is RGB = (0,0,0) aka Black.
B. upwards right: positive X, positive Y, and zero Z. That makes Red + Green + no Blue => Yellow.
C. downwards right: positive X, negative Y, zero Z makes Red + no Green + no Blue => Red
D. upwards left: negative X, positive Y, zero Z makes no Red, Green, and no Blue => Green.

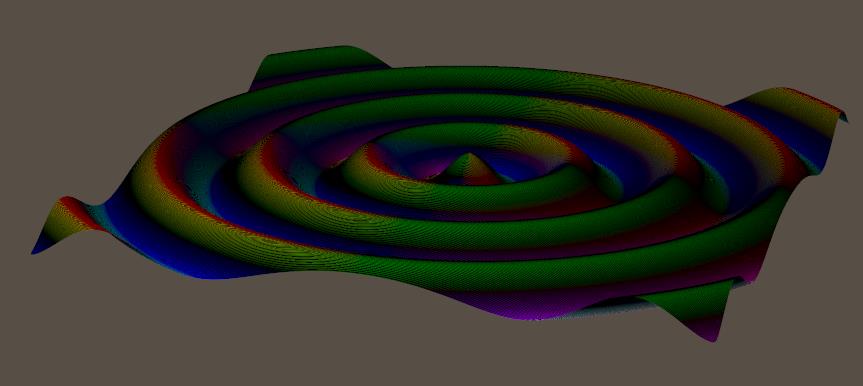
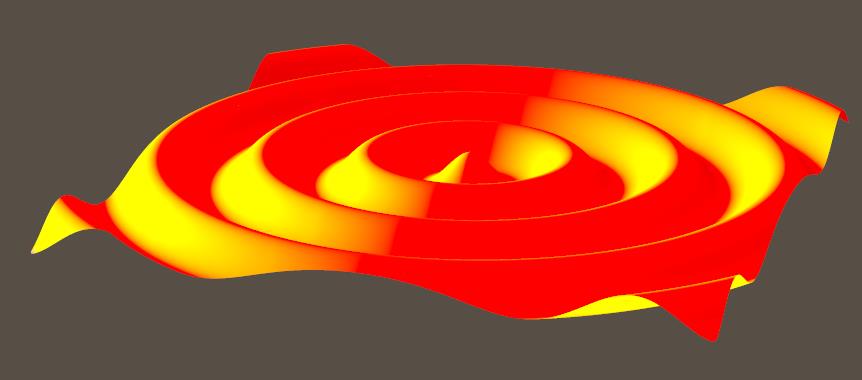
I leave dNdv to you:

Note that you’ve got to walk to the back, the positive V direction, which makes Z increasingly negative while X remains 0.

Next >

What are the stretching (dPdu, dPdv) nodes used for?

Nodes are the essential building blocks in the Advanced interface to the Poser Material Room. They are the graphical representation of mathematical function calls, that is: calculation procedures which turn parameters (inputs) to a result (output).

Advanced

The nodes from the Variables group tell me about the position, in space and time, of the spot that the PoserSurface definition is constructed for. There are two kinds of results from these nodes:

  • Single values.
  • Three value ‘vectors’. Like a color is defined by (Red, Green, Blue), so is a point in space defined by (X,Y,Z) and so on. These are discussed in a previous article (place P and normal N), in this article (stretching dPdu, dPdv) and in the next one (curvature dNdu, dNdv).

The four Variables mentioned last tell us about the shape of the object, and the mapping that comes with it. When a large step in Poser space from one point on the surface to another comes with just a tiny step in U or V, then the mapping stretches the texture over a large area. In the inverse case, the texture is squeezed into a tiny spot. That is what dPdu and dPdv are about. A large value for dPdu means: stretched. And by the way: it’s a vector, so we can have stretching in X and squeezing in Z direction, for instance.

Visualization

To visualize them for a probably better understanding, the following renders show them translated to colors. First dPdu:

Let’s start in the middle and move gracefully to the right, the positive U direction. So, adjacent point will not differ in Z direction, and hence there will be no Blue (3rd vector component) in the result. And they will positively differ in X, which introduces Red (1st component). At the upgoing side of the wave, points will differ in Y in a positive way (the path is up). This makes Green (2nd component), and with the already available Red this will make Yellow, as we see. At the downgoing side of the wave, points will differ in Y as well, but in a negative way. Negative values are clipped to 0, and only the Red will remain. Note that when I walk to the left, I make negative steps in U, so the upgoing path will be red, and the downgoing part – with a negative Y as well – will turn yellow as negative * negative makes positive.

Now let’s look at dPdv:

Let’s start in the middle and gracefully move to the back (that’s increasing ! in V). As the X value won’t change, there will be no Red (1st component). The Z value decreases gradually as Z is positive in forward direction, and we’re walking backward. This negative value is clipped out when turned into a color, which is why we won’t see any Blue (3rd component) either. While walking to the back (positive V steps) the upgoing portions of the path have a positive Y difference, and so the result will turn Green (2nd component) there. The downgoing portions have a negative Y difference, which will be clipped out. Then in that case no color-values are left, and the result is black.

Brief conclusion: dPdu and dPdv are vectors. Large negative or large positive values indicate surface stretching in either direction, small values indicate squeezing of the image onto the object. Large and small in this are relative to the size of the object. From left to right, U changes from -1 or 0 to 1, while P changes with the object-size in X direction. So, dP/du equals (half of) objectsize_X for a non-stretched non-squeezed mapping.

Next >

What are the point P and normal N nodes used for?

Nodes are the essential building blocks in the Advanced interface to the Poser Material Room. They are the graphical representation of mathematical function calls, that is: calculation procedures which turn parameters (inputs) to a result (output).

Advanced

The nodes from the Variables group tell me about the position, in space and time, of the spot that the PoserSurface definition is constructed for. There are two kinds of results from these nodes:

  • Single values.
  • Three value ‘vectors’. Like a color is defined by (Red, Green, Blue), so is a point in space defined by (X,Y,Z) and so on. These are discussed in this article, in the next article (stretching dPdu, dPdv) and the article after that (curvature dNdu, dNdv)

Slightly more intriguing than just single values U and V are normal N and point P:
  • P is a vector representing the position of that spot itself in space, and
  • N is a vector, representing the surface normal at the spot at hand.

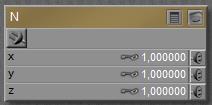
So P= (0,1,0) for the spot on the object surface one unit above the scene center, and N= (0,1,0) for pointing upward from that spot.

Actually, the first component of the vector is the first component of place P or normal N respectively, multiplied by the value presented in the node, and multiplied by the inputted value (or image brightness) plugged into that slot as well:

Result X (xyz) = N X (xyz)* NodeValue X * ImageBrightness (xyz)

Visualization

To visualize these for a probably better understanding, the respective node is plugged into Diffuse Color. The (X,Y,Z) vector will then be interpreted as (Red, Green, Blue) as far as the values are in the 0..1 range. Values outside that range will be clipped, like negatives are interpreted as 0.

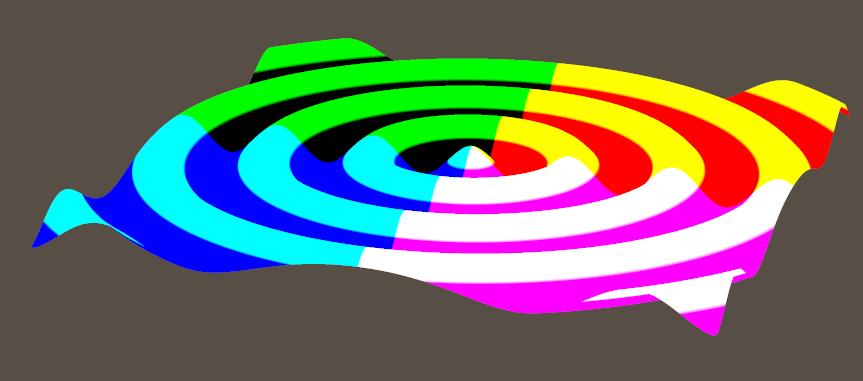
The P node, translated to colors, gives:

In the right half of the object, X is positive so Red is “in” but in the left half, Red is missing. In the upper half of the object, Y is positive so Green is “in” but in the lower half, Green is missing. In the front half of the object, Z is positive so Blue is “in” but in the back half, Blue is missing.

So the right upper back part will show full Red and Green but no Blue, that is: full Yellow. And so on. The colors are hard, as the vector component exceed 1.0 quickly.

To visualize things even more, this is what I get when the P vector is shrunk: softer colors because of smaller RGB values, because the values in the node were set to 0.01 (instead of 1.0):

And when the first component is made large and the third one small:

Then I’ll get hard color edges in X (left right) direction, and soft gradients in Z (back front) direction:

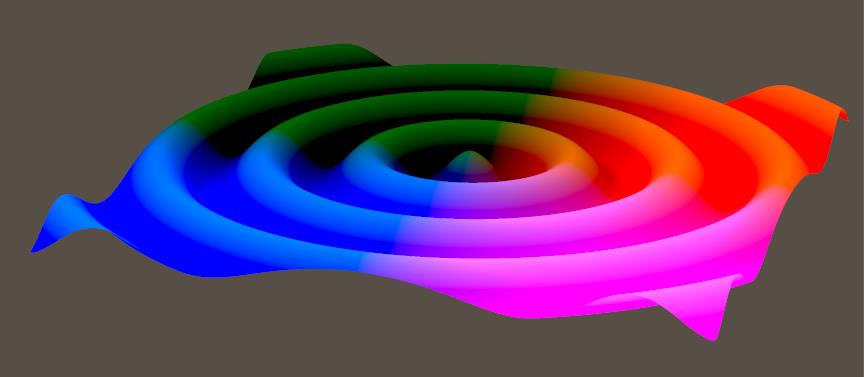
The N node can be visualized as:

Normals point – perpendicularly – away from the surface. Pointing towards the upper (pos Y) left (neg X) front (pos Z) disables the Red (negative X is clipped to 0) and hence leaves Green and Blue making Cyan. And so on.

Next >

What are the Variable nodes used for?

Nodes are the essential building blocks in the Advanced interface to the Poser Material Room. They are the graphical representation of mathematical function calls, that is: calculation procedures which turn parameters (inputs) to a result (output).

Advanced

The nodes from the Variables group tell me about the position, in space and time, of the spot that the PoserSurface definition is constructed for. There are two kinds of results from these nodes:


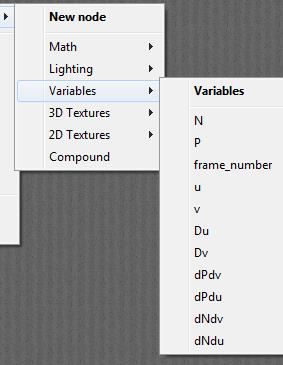
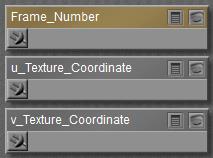
The easiest to comprehend are U, V and Frame_Number. These nodes don’t take any inputs but just report the situation in the scene: at what place on the object surface(U,V, both 0..1) at what time frame the spot is located for which the PoserSurface definition has to report on to the renderer.
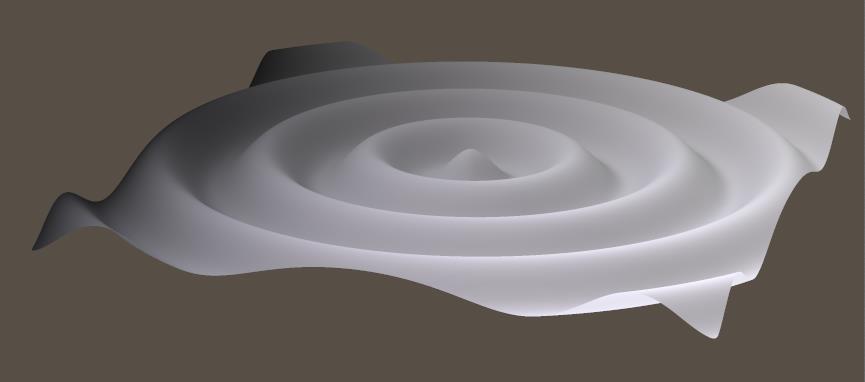
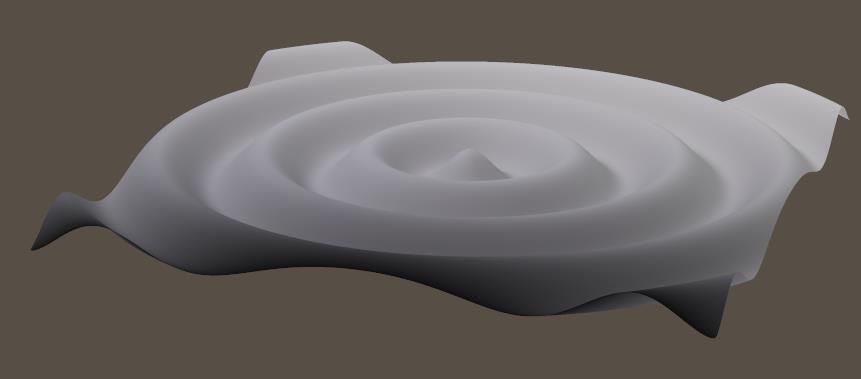
Du and Dv are sold in the manual as “defining a rate of change” but actually both produce a solid 0.0 whatever the shape and mapping of the object. Sorry for that.

To visualize U and V, just plug the nodes tight into the Diffuse channel, like

And the value from the node will drive the brightness of the color.

U from 0 (black) to 1 (white), from left to right:

V from 0 (black) to 1 (white), from front to back:

Next >

What is the Compound node used for?

Nodes are the essential building blocks in the Advanced interface to the Poser Material Room. They are the graphical representation of mathematical function calls, that is: calculation procedures which turn parameters (inputs) to a result (output).

Advanced

Connecting node outputs (function call results) to node inputs (function call variables) make a very flexible way to build material definitions, like a programming language. The disadvantage is that the resulting node-trees might become quite large, and incomprehensible.

The Compound node is offered to resolve this, as a way of packaging.

Let’s take an example. In the definition area of Material Room, add a Compound node. It’s empty, and looks like:

Open the node (the  button), and I can build a complete structure between the final node containing all External Outputs (left in the scheme below) and External Inputs (right in the scheme).

This example structure calculates

Output_3 = [ 2 * ( 2 * Input_1 +1) ] * [ 1 * ( 3 * Input_2 +1) ]

When done building the node can be collapsed (the  button) and will just show the outputs and inputs defined in the Material Room definition area:

Yes, you read it correctly; the compound node can offer multiple output slots.

On top of all this, the context (right-mouse-button) menu offers two additional options:

The first, Collapse, is a fast way to create a new Compound node. Just select all the relevant nodes I want to be moved into a new Compound one, and click this option. This will give me a Compound node with those nodes, plus an External Outputs and an External Inputs one. The only thing I have to do now is to create – or check – the connections between these External nodes, and the structure I’ve moved in.

The second, Expand, does the opposite. It takes the selected Compound node, moves the embedded node structure to the Material Room area, and eliminated both External nodes. In both cases, existing connections between nodes outside and inside the Compound nodes are maintained, and (de-)assigned to the External nodes as appropriate.

So

Becomes

And

And reverse.

Next >

Shader tree construction: Math, Variable and Compound nodes

Nodes are the essential building blocks in the Advanced interface to the Poser Material Room. They are the graphical representation of mathematical function calls, that is: calculation procedures which turn parameters (inputs) to a result (output).

Advanced

Like I can define my own surface definitions by plugging node driven effects into PoserSurface (and other root node) inputs, so I can define my own effects by combining nodes into constructions. Functions calling functions calling … and so on.

Of course the effect nodes themselves, as discussed in the various articles, are relevant bricks in such constructions. But to glue them together and to help me with the construction, the nodes from the Math group make the mortar between the bricks. And the nodes from the Variables group get the information from the scene, like the time and place of the spot on the surface for which PoserSurface is defining the material for. As node constructions can be huge, the Compound node was introduced (Poser 10/Pro 2014) to keep clear boards in the Material Room.

Next >

Material Zones, or: to which Body Parts do the materials apply to?

Although various configurations can be setup via Material Room menus, and can be managed through the Simple interface, this topic is considered Intermediate level.

Intermediate

Each object in the Poser scene is a mesh, consisting of vertices, and polygons defined as ordered groups of vertices; usually three (tri geometry), or four (quads). On one hand, an object mesh even can be formed by multiple submeshes declared to be one, even when they are not connected. On the other hand, a single continuous (sub)mesh can have its vertices and/or polygons organized into groups.

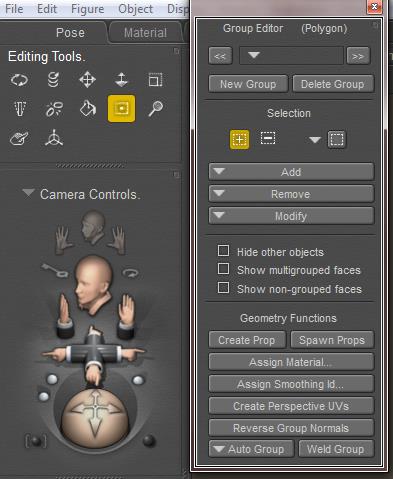
In Poser, groups are managed via the Group Editor, accessible via the Grouping Tool icon in the Editing Tools palette. The Group Editor takes a serious portion of the Figures and Props Editors chapter in the Poser Reference Manual, and reading this carefully before use is much recommended as the tool is quite powerful and can have drastic effects on the behavior of objects it’s applied to.
The tool can be used in various ways:

  • To select polygons, and duplicate those into a prop. For instance: select portions of the head into a new Mask prop.
  • To group polygons into Body Parts, this in turn can be affected by the bones of a figures skeleton. Those bones turn a prop into an animatable figure; this grouping is done from the Setup Room.
  • To group polygons into Material Groups or Zones. See below.
  • To group polygons into Hair Groups, this is done from the Hair Room. Those are the areas I can grow hair on, and apply the dynamics of wind and gravity to, according to my requirements. In http://www.book.artbeeweb.nl/book-poser/hair-room/ you can find some Hair Room tutorials to start with.
  • To group vertices into Cloth Groups, this is done from the Cloth Room. Those are the areas I can apply the dynamics of body moves, wind and gravity to, according to my requirements. In http://www.book.artbeeweb.nl/book-poser/cloth-room/ you can find some Cloth Room tutorials to start with.

Material Zones

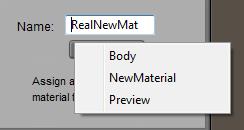
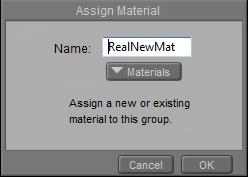
When I’m in the Group Editor, and I have selected / created a (Body Part) group of polygons, and I click the [ Assign Material.. ] button, I can either enter a new material name, or select an existing one from the list.

or

Note: in Cloth Room, the Group Editor works on vertices instead of polygons. Therefore, new material groups cannot be defined from there. The button just will not respond.

Then, from Material Room, I can define a material definition for that (Materials) zone:

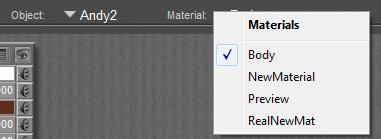
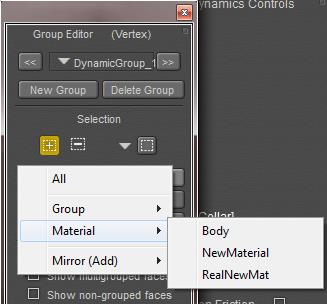
But also, those Material Zones are available for defining and refining selections in groupings elsewhere (via the [Add] or [Remove] buttons). So, all vertices or polys from a Material Zone can be assigned specific dynamic properties in Cloth Room. This way, I can make portions of a dress not only look like leather or lace, but also behave as such.

And via Hair Room, I can make long and short fur or hair, both having different dynamic behavior and different colors (via Material Room) as well, by using the same groupings.

Next >