Poser Settings
The behavior of the Poser program can be adjusted by the various settings in the General Preferences (in the Edit menu, or via Ctrl+K). To be honest, those settings are the result of a long life full of developments, and so the organization of the options is not always clear to everyone.
Saving the user interface
For instance, Poser has quite a flexible user interface. I can change the whereabouts of the various panels, I can make panels – including the Render/preview (aka: Document) pane – float to maximize the use of my dual-monitor system, I can change the way objects are displaced in the Document panel, and so on. And I can save all this for use in later sessions.
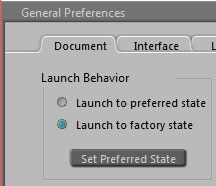
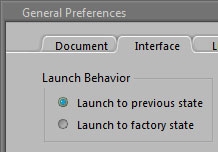
| I can do so in the Document tab … | and I can do so in the Interface tab |
When I set to save my preferences in the Documents tab, it saves the Display Style (Texture Shaded, Cartoon, …), and the Display Tracking, Depth Cue and Display Shadows settings. As I never alter those settings structurally, I’ll leave them to factory settings: Texture Shaded, Full tracking, Depth Cue off and Shadows on. The saving is done when I click [Set Preferred State], check the Preferred State option and click [OK]. Again: I hardly use this.
When I set to save my preferences in the Interface tab, it saves all panel sizes, locations, whether they show, hide, dock or float – and where on my desktop – and the way the Document Windows is laid out: one view, four views, etc. As I do like to continue my work where I left off, I launch to previous state here. Unless I’ve made a mess of all of it and I like a clean start, then I select Factory state for once, close Poser, reopen it and check Previous state again. The saving is done every time I close Poser.
Mouse usage, also a decent part of the User Interface, is arranged for in the Interface tab.
Where I can enable Tablet Mode, that is: a large distance by pen is translated to a small distance in the Document Window, for greater accuracy. And I can alter the behavior of a 3D Mouse, so when I pull it (decrease Z value) the object or camera moves towards me (increasing Z value instead). And so on. This is because other programs might have the positive Z-axes pointing backwards.
Performance settings
The settings which effect RAM and CPU usage are scattered around the Preferences tabs, at least to my sense of logic. Some of them do not apply to Poser 8 or earlier.
The Document tab let me change the amount of Undo levels (these consume some RAM usage but are stored on disk mainly) and allow for multithreading (consumes processing power during design time) when bending objects.
On modern machines the default values (100 levels and Multithreaded ON) are fine. But perhaps adjustments improve the performance of older laptops running 32bit Windows. Which then are not used for rendering I hope.
Other performance effectors are in the Render tab.
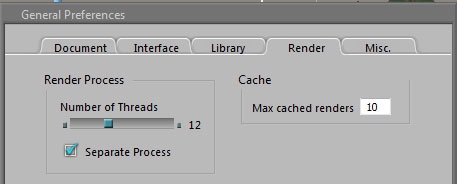
Separate Process (OFF by default) forks out the renderer which therefore is freed from all the hassle from the design process, a memory saver as discussed in the RAM usage section. Number of threads should be left to a default (it auto detects the machines maximum). See the CPU usage section on how to launch Poser in reduced priority mode, which is a far better mechanism.
Caching renders, caching textures and caching undo levels are about similar: as discussed in the File Usage chapter (Files while working), the information is stored on disk but portions are kept in memory to reduce continuous disk access. Thanks to the severe compression of images, a 100kb EXR file on disk might take 4Mb space in memory. But usually rendering is the process which makes us short of RAM, and rendering as a separate process is the answer to that.
Object handling
This is another subject which is scattered over tabs.
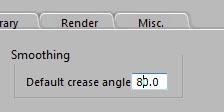
| The document tab offers the Default crease angle | |
| while the Interface tab offers the Display units setting |
Crease angles
Crease angles effect the rendering result; two adjacent polygons which make an angle larger that this value will have a sharp edge in between, while the edges between polygons with a shallower angle will get smoothed. The Smoothing setting Default… will set the crease angle for objects which are loaded into the scene, and do not have their crease angle set already (see *).
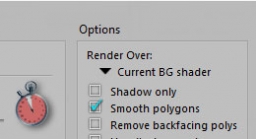
| Experiencing any effect of this requires the Smooth Polygons switch is ON in the Render Settings (OFF by default to save RAM and CPU requirements at the cost of producing a reduced quality result). | |
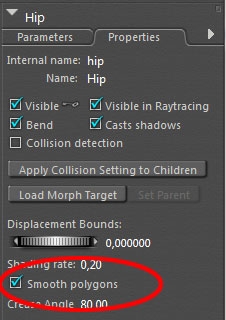
| It also requires that the Smooth Polygons switch is ON for all objects required. This switch can be found in the Properties tab of the object(part), see image on the left.By default it’s ON so the Render Setting affects all objects, but I can switch it OFF to prevent a nice fragmented object to become smoothed out.Here I can set a particular crease angle as well. |
I can reduce the value to give the object its faceted appearance (eg when the objects goes ‘blobby’), or raise the value to reduce the facets seen in the render result. Values from 89.5 and up are to be avoided as they turn a decent cube into a ball. But okay, it’s your render.
(*) when I load Vicky, or Grey Alien or whatever Poser figure I’ll find out that its crease angles are set to the Poser default 80, whatever my settings are in the General Preferences. But when I load a Primitive Prop (ball, cube) or a non-Poser object from an OBJ file or alike, the General Preference settings are taken into account.
Display Units
All Poser objects and scenes are saved in Poser Native Units, and just for user communication are translated to other units like inches or meters. Basically, when I (having a Meters-setting) save a scene, send it to you and you (with an Inches setting) read it back in, we’ll deal with the same thing. My 1,0 (meter) will end up as 39,4 (inches) on your Poser display.But there are some pitfalls.
- When importing objects in any 3D format, they are set to x% of a normal figures height which is about 6 feet = 72 inches = 183 cm. So, for churches I’d better set a high value for x and for mushrooms I set a low value unless I want my 6 feet elves to sit upon them.
- The values used for cloth behavior in the Cloth Room are all based on grams (not: kilos), meters and frames (not: seconds) and do not change when I alter the Display Units. In case, you need to perform the meters-to-inches conversion yourself.
The Library tab
Well, it handles all interfacing with the Library. Actually there is no reason to change any of the default values. The details were discussed already in the Library section of this series.
The Misc tab
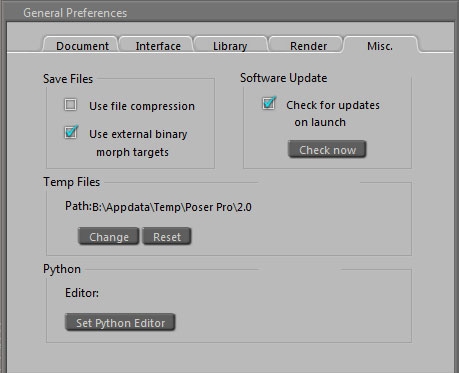
Actually this tab contains all file handling options, like Compression. Native Poser files are in ASCII (character) format, which makes them favorite for compression. For example: the basic scene showing Andy takes about 400kB uncompressed (PZ3 format), and 24kB compressed (PZZ format).
However, some additional programs cannot handle PZZ files, which forces me to serve them uncompressed pz3 material. On the other hand, when I’m into scene development and store over ten versions of my project file, compressing is a serious disk space saver. So I have this option checked. Anyway, there is an (un)compress function in the Scripts \ Utility menu to handle separate files and folders afterwards.
When you decide to work with compressed files, and you want your Poser to start in Below Priority mode after double clicking the .pzz file, read the CPU Usage section on the way to accomplish this.
Use External Binary Morph targets (or: EBMT) creates additional .PMD files which allow for various modern Poser features. It should only be off when you want to open your files in legacy Poser programs. I don’t, so I leave this option checked.
Whether you want to get a signal when Smith Micro has issued a new version is up to you, and a Python editor is relevant for Python script developers only. I’m not one of them. Sometimes just Notepad or Wordpad is the program of choice, but there are some dedicated scripting editors around.
The Temp folder is used for caching Undo levels, Shadow maps, intermediate Render steps, scene Textures and more, and by default the standard user temp folder is used. Just clean up this folder regularly, a load of other programs are putting their temp stuff in there too. My personal solution is to dedicate a part of my plethora of RAM memory to emulate a hard drive, aka a RAM Drive (B:\). It’s pretty fast. And, every time I start up or reboot my system, it’s empty. I can recommend RamDisk for jobs like this.
