Featuring Poser Pro
Poser Pro, from version 2010 up, presents some additional features for generating render passes, and high quality results.
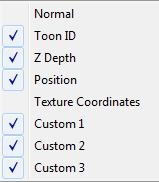
In Render Settings, the right bottom corner, you”ll find the Auxiliary Render Data. Just check a few, render, and export the image (as, say, Multipass.png).
In this example I’ve checked six options, and hence I get seven files:
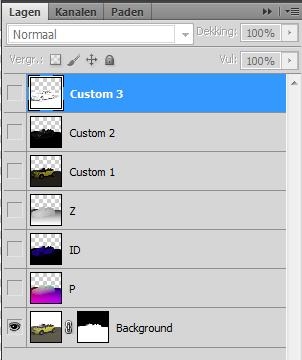
- My Multipass.png final render result
- Multipass Custom 1, 2 and 3.png results
- Multipass P, Z and objectID.png results
It does so for each image format, JPG, TIF or whatever I select. Unless I select the PSD format, this gives me one Photoshop file with seven layers. Blending modes nor opacity is set yet, layers are switched off and the final render result is presented as the background layer, with a transparency mask.
For the High Definition results (16 or 32 bit per color) file formats HDR and EXR things work exactly the same, you’ll get all files in one export. Please remind to check the “HDRI optimized output” box before rendering when you want to go the HDR route. EXR is Poser internal format, use it when you can afford it.
Let me show you what can be done now.
Custom 3
Assuming that nothing else is arranged for (*), this image or layer stands for: Shadow. So the blending mode should be set to Multiply. And as a bonus we can forget about that previous Separating the darks chapter, because this is catered for already.
Custom 2
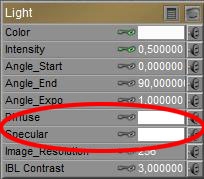
To make the maximum use of this, I push the specularity in materials and lights to their limits while keeping the proportions between the various materials. Then I can reduce the shine in the scene by controlling the opacity of this Specularity / Custom 2 layer.
Custom 1
Again, assuming that nothing else is arranged for (*), this image or layer stands for: Diffuse. This is the other – and effectively most relevant – portion of the lit scene. This layer should be in Screen mode too.
(*)
Each PoserSurface in the Material Room has three extra slots, where anything can be plugging in what you like. The result of that will not appear in the render result, but will end up in the appropriate output file or PSD layer to help you to establish specific masks for special effects. When not filled, Diffuse, Specular and Shadow take the place of Custom 1, 2 and 3 respectively.ToonID or ObjectID
Each material gets its own ID (or you can assign the same ID to more materials, but why should you do that?), and in this layer each area with the same ID is represented by its own unique color. So, especially when I set the range of the Photoshop colorpicker to 1×1 (point) resolution, I can make selections in the image by just picking a color. This way, I can build masks ans working selections very efficiently. Hence, this layer is a helper, not part of any result as such.
Z-Depth
The greyscale in this image or layer represents the distance from the camera into the scene. Nearby is bright, far away is dark. This helps me to place some fog in the scene.
- I make a working copy of the layer, and replace all transparencies by black: these areas are really far out
- Then I invert this layer, so near becomes black and far away becomes white
- With Ctrl A, Ctrl C is put a copy on the clipboard
- I add a new layer, and fill it with some cloud structure (Filter, Render, Clouds)
- I give this layer a mask, open the mask (Alt-click), and with Ctrl V I put the inverted Z-Depth into the mask
- Voila, fog increasing with distance
- And now I can alter the brightness and contrast of the mask to change the fog density and fall-off rate.
Or, use a dark teal color instead of the clouds, and you’re in a deep sea environment. Take your pick, instant atmospherics.
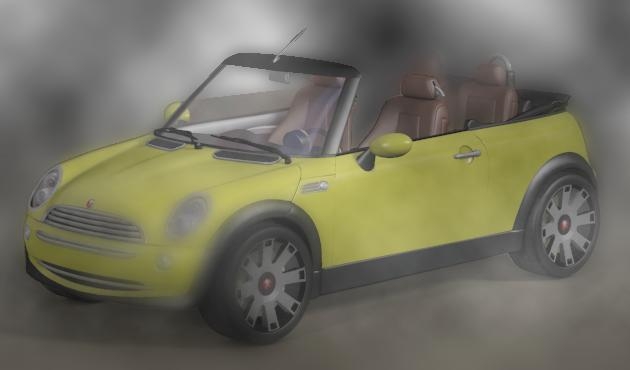
Another popular thing to do with Z-Depth is creating a Depth of Field effect, or: focal blur. I start with a single layer copy of everything else in the image, Crl+Alt+Shift E does the job in Photoshop merging all (visible) layers into a new one. I put it on top, and give it a serious amount of blur. Then I give it an empty Mask, and copy-paste and invert the Z-Depth into it exactly like I did when making fog. Or otherwise: Ctrl+click the mask of the Fog layer, this will turn that mask into a selection, and then assign a mask to the Blurred layer, which turns my selection into a mask again. Whatever suits you best.
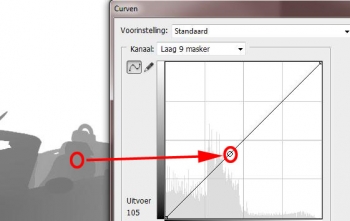
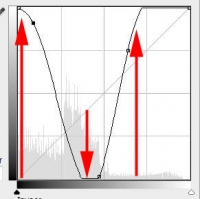
Now the blur is strong at the back (mask is white), intermediate in the middle where I want the sharp focus (mask is grey) and absent at the front (mask is black). But I need it black in the middle (no blur) and white upfront as well, that creates the focal blur effect.
So I Alt-click the mask, and start applying the Curves adjustment. By clicking the drivers chair a dot on the curve tells me how grey it is (105 out of 255 in this example below), and then I raise the extremes and lower that 105 midpoint. That’s it.
| => |
Position
This a bit like Z-Depth, but now I can find the X,Y,Z positions in the respective R,G,B channels of this Photoshop layer. You can dream up your own applications for this, one I use often is: use the green (Y, height) channel for making height depending ground fog.
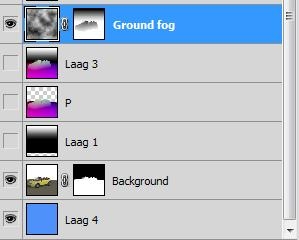
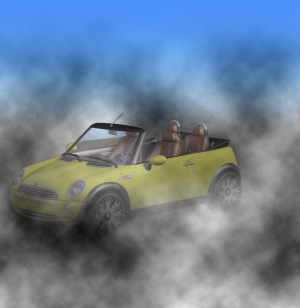
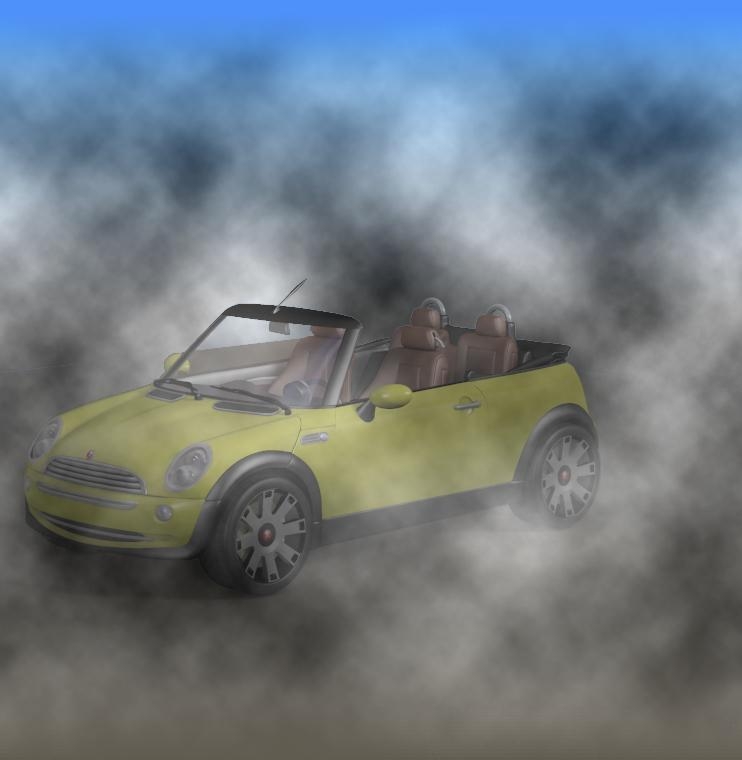
I gave the P(osition) layer a black-to-white gradient background (layer 1) because I had to get rid of the transparency, created a new combi layer (Alt+Ctrl+Shift E) – layer 3, switched to channels, selected and copied to Green channel to the clipboard, pasted this into the mask of the cloudy Ground Fog layer, and inverted it as ground fog is dense (white) at the ground. With an extra blue background, this is a first result.
For a better result, the ground fog density should be distance dependent too, shouldn’t it? So the final cloud mask has to be the multiplication of this height-dependent mask, and the previous depth-dependent mask.
So I create two layers, each containing the masks, set the bottom one to Normal blending and the top one to Multiply, I combine the layers (Ctrl E), and select – copy – past the result into the cloud mask.
See the result; a brownish cloud hue puts the car in a nice sand storm.
Do note that I just demonstrated the use of the height and depth information over a simple background. Instead of this background, the Diffuse, Specularity and Shadow layers should be combined in proper proportions. Then the fog layer should be on top of them, in Normal mode.
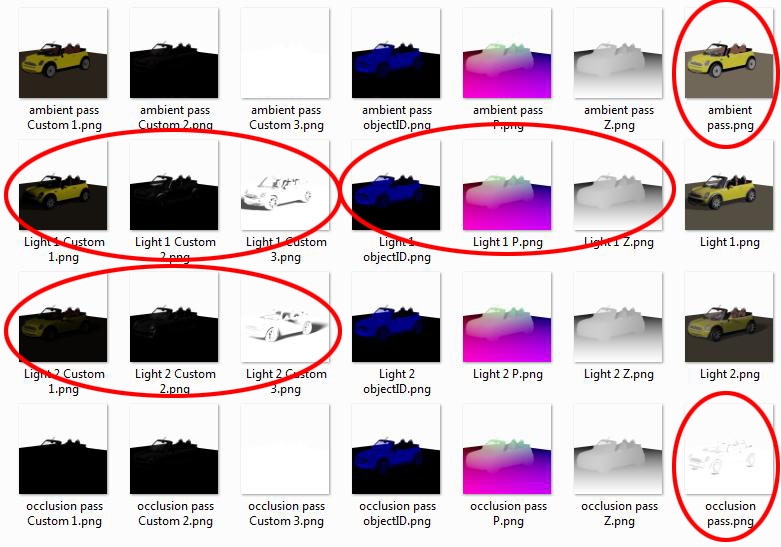
So, with this method I don’t need the first Separate the Darks – method. But I still can use the second Separate the Lights approach. Since this method produces seven files per render (as I ticked six layers plus the total render), and makes a render for each light (I’ve got to in this case) plus the two options (Ambient and Occlusion) checked, I end up with (6+1) * (2+2) = 28 intermediate PNG results.
A lot of those are duplicates, or of no use, and can be discarded. The ones I need are:
- For Light 1.. N the Custom 1,2,3 (Diffuse, Specular, Shadow) layers, and perhaps the final results as well
- Only one set of ID, P(ositon) and Z(-depth) layers, as they are all the same for the various lights
- The ambient pass and the occlusion pass.
And when I want a hard-shadow and a soft-shadow version, I’ve to alter the settings per light, and rerun without the need for an extra Ambient or Occlusion. And I make sure to rename the first Custom 3/ Shadow layers first, otherwise I won’t get anything new. From then on, I can put all the required layers in one Photoshop file and start coloring and dimming the diffuse, specular and shadows on a per-light basis, and so on.
Some notes:
- Existing files are NOT overwritten, the new outputs are just not saved. So please do save in empty folders or rename existing files if you want to make any real progress.
- As the Diffuse / Specular / etc layering aims at exporting the image in PSD format, the split is available when saving to other image formats as well, but limited to the 8-bits per color formats only. PSD, JPG, TIF etc are fine, but the split does not work when exporting to HDR or EXR (32 bit per color) format.
Of course, switching lights on/off and blackening Diffuse and Specular channels per light can be done manually or in a new script. That’s tedious though. -
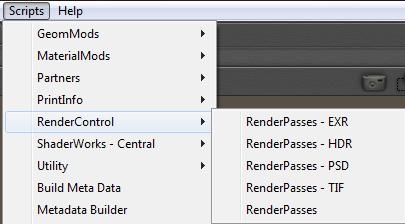
The script which does the per-light split is written for PNG only. Perhaps someone can build a file-type selector, but in the meantime I’ve created just a few duplicates. The “png” buzzword appears three times in the script as a SaveImage parameter, and can be replaced by other buzzwords. “tif”, “jpg” and others are fine according to the PoserPython manual, but the (undocumented) “psd”, “hdr” and “exr” work fine too.
Again, in combination with the layer-setting, choosing any 8-bit per color format gives the fine split on diffuse etc on a per light basis, while the 32-bit formats do not give the layered results but still make results on a per-light basis.

