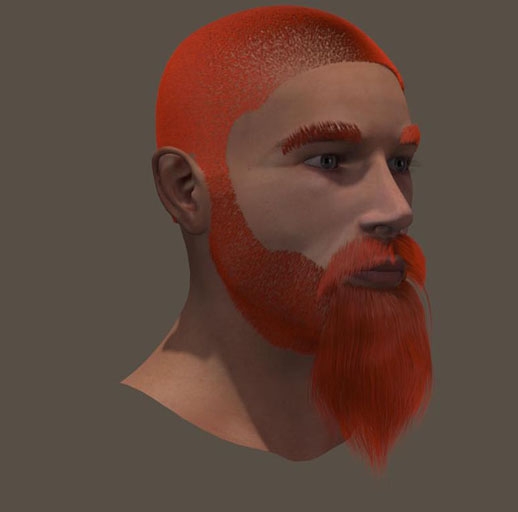
I’m going to work Ryan (Poser 8 figure), but anyone else is fine too. The reason I’m picking Ryan instead of Android Andy is that Ryan comes with image maps for its textures, while Andy just has color settings only. I’m going to use these.
Preparation
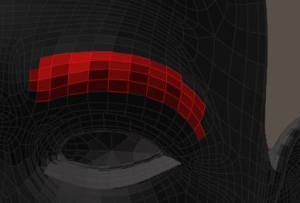
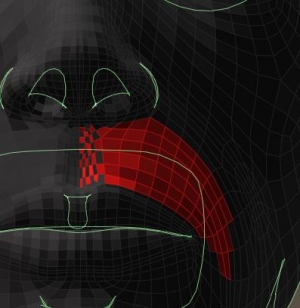
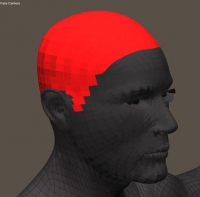
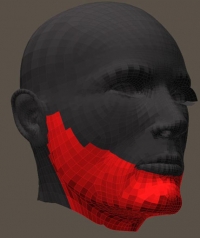
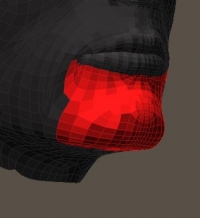
Although Ryan himself comes with Hair Props (Scull Cap, Beard, Brows etc) in the Library, I just make them myself for the sake of this tutorial. As I’m going to do Ryan’s head and front, I make the Growth Groups first by selecting the bodyparts in preview (switch to Flat Lined mode for easy poly selection), and by using [New Growth Group] and [Edit Growth Group]. The Front groups are simple selections from the Chest and Abdomen body parts. To the head, I assign multiple groups. Beard, Mustage (Left and Right, so I can use opposite Pull Side settings), Brow Left and Right (same reason), and Head which I do not subdivide as I’m going to do short outstanding hair only, without styling. Otherwise, a Left, Right, Back, Upper Right and Upper Left would have been handy. For the fun of it, I did make a second Beard area around the chin (in the Hair Editor: [Add Group], select Beard and delete the unneeded polys.
Note that on the mustache I deselected every other poly just below the nose, since these polys are very small. Populating hairs on all polys will make the mustache too dense in this area.
Headhairs are easy, trimmed, not shaven so 5mm (0.005 in meters, 0.2 inch) will do. No length variation, no pull as they all stand out, 1mm (thickness 1) at tip as well as root, nu clumb or kink, and 4 verts per hair will do fine as I’m not going to style anything. So the real issues are the color and the density.
From Materials Room I learn that RyanHead.png is the texturing file, I make a copy in my project folder and measure the head color in Photoshop (or GIMP or anything). It reads about RGB=(220, 150, 115) but I like a bit more red so I set the root_color as brown HSV (10,180,80), the tip as orange HSV (10,240,120) and the specular_color as HSV (10,40,60). Darker to make is less shiny than usual, but all colors are picked in the same Hue (10 in this case). I tend to work that way. Root_softness should go up, say 0,25.
Filling In
Now I need some test renders, to improve on the hair density and the various parameters.
- Length= 0.005 (5mm), variance = 0
- Pull = 0.00050 (back) 0.00010 (down) 0.00000 (side)
- Density = 400,000 (test renders) or 1,600,000 (final render)
- Width = 2 (tip as well as root)
- Clumpiness = 0,0
- Kink = 1.0 (strength) 4.0 (scale) 0.0 (delay)
- Verts = 4 (test renders) or 16 (final render, takes time)
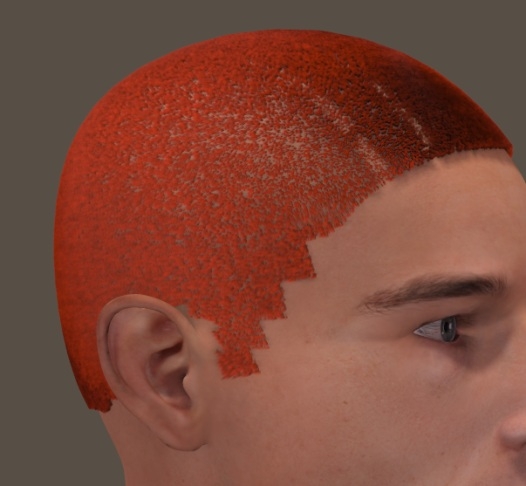
Not too bad, except for the jagged egdes at the sides but I’ll going to deal with that. The main trick then is to remove hairs by making them transparent, using an image (transparency map).
Note that this differs completely from the classical “hair transparency map” in which streaks of hair (props, clothlike flaps) were assigned a hair texture and transparency. In the approach presented here, hairs are made totally transparent as being shaved away. This way I can make fun shaving patterns too. For this, I need a (head) seam guide or template which tells me the way the head texture is mapped.
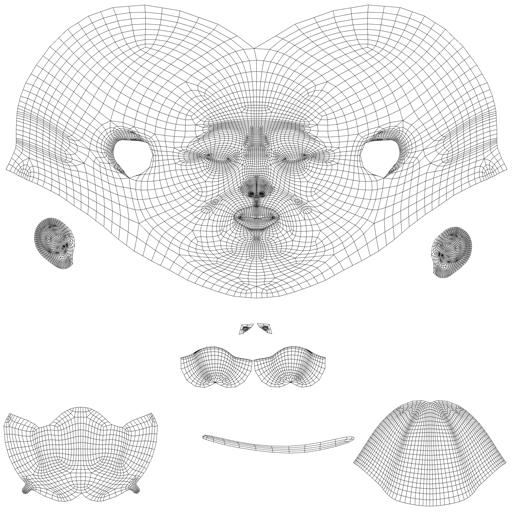
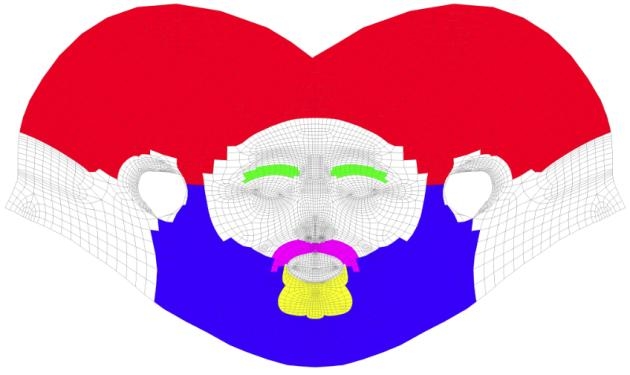
The Ryan template can be found in (main Poser Runtime) \ textures \ Poser 8 \ Ryan \ Templates, but a load of templates for other figures can be found at www.snowsultan.com.I open the template in Photoshop (or whatever you like) and make a working copy to a second layer. The template offers a 2D representation of the 3D polygon mesh, although very fine meshes are usually represented by a courser structure to keep things workable.
As a first step, I start to full all polys in the Photoshop image with a color, until I have a neat match to the Hair Growth Group on Ryans head. And I whiten out all the elements in the template that I won’t need anyway, but I do not alter the size of the image itself.
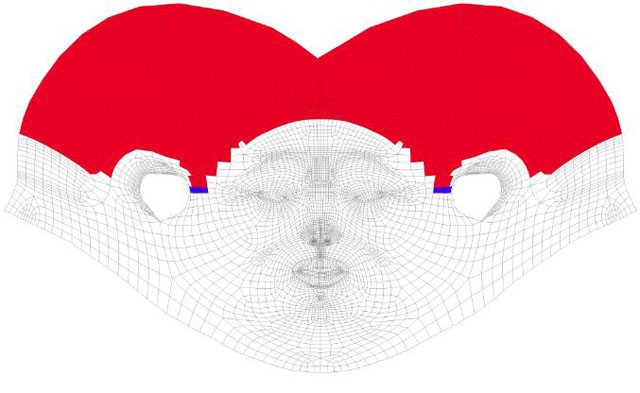
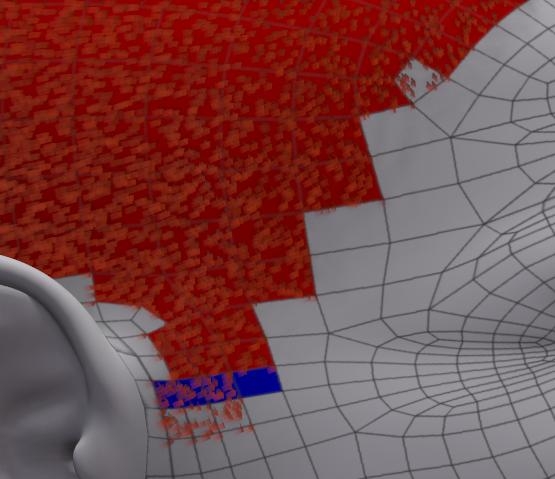
Next, I’ve got to answer the question; did I really pick the right portions in the image? The template can be done in a lower resolution than the 3D mesh, so one row of blocks in the 2D image might represent multiple rows of polys in 3D. And I’m a bit worried about the ear-region. So I save the template to a new name, and in the Poser Material Room I swap Ryans neat texture for the saved template. Don’t overwrite anything, and ensure that you know where to find the original texture, to get back where you came from originally. I made a copy of that in my project folder when I found out about the colors, describe above. From the result I find that I did quite well, except that at Ryans right (my left) the head-hair (red) meets the beard (blue marker) two rows lower than at Ryans left. To be corrected in the Growth Group. At both left and right, there is something at the ends of the front hairline, and you can see at the top-right in the image. A white square does contain hair. To be corrected in Photoshop. The area around the ear can be improved up, to be corrected in both.Smoothing Up
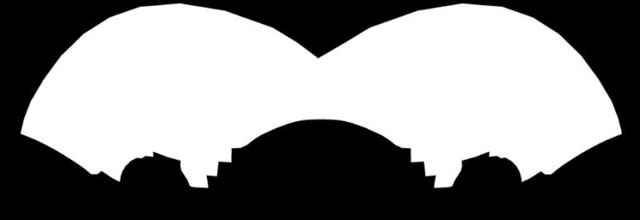
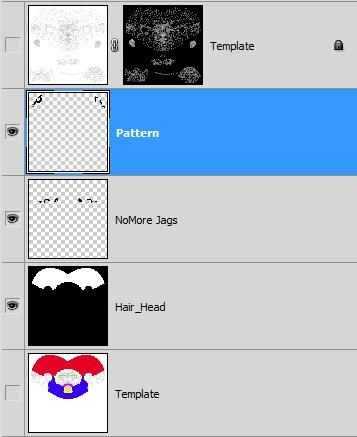
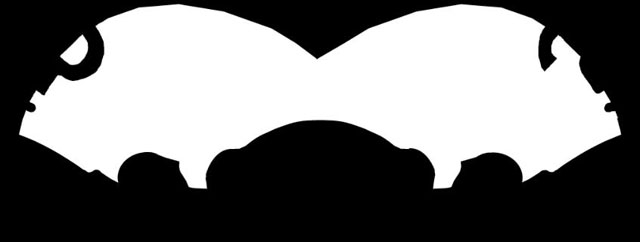
When the 2D coloring is done, I select the (in my case: red) color, grow the selection with 1 or 2 pixels (to get rid of the non-selected grey template lines), make a new layer and paint it white within the selection, and black outside:
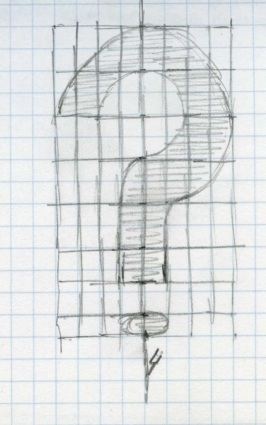
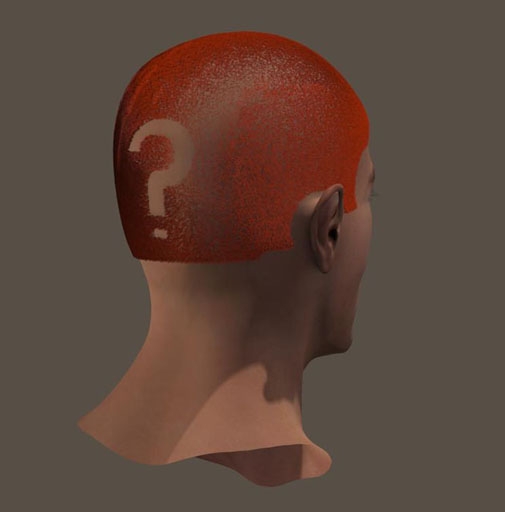
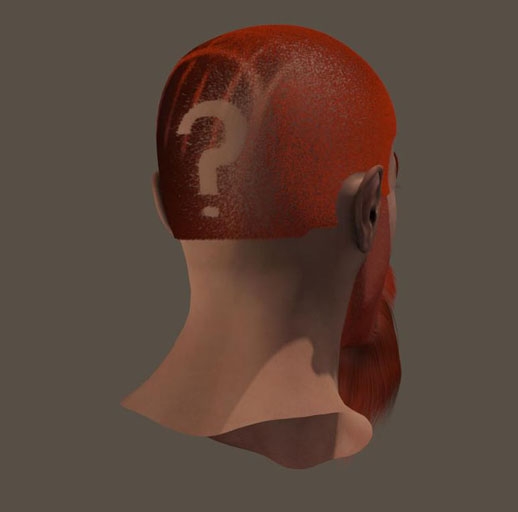
But I also can use this technique to create some shaving patterns, as long as I take into account that a straight curve on the head, horizontal or vertical, is a round curve in the template, split in halves, and upside down (the higher up the image, the lower towards the neck).
There are special programs that can help me, which also help mapping tattoos, texts and logos (decals), or just paint in 3D straight on the head itself. There are various Photoshop tools and techniques to help me out (Liquify etc), and I can deploy some Photo Morphing program – which turn a lady into a man or a jaguar, but of course also can map a subdivided rectangle onto a curves template.
So I did, note that I compensate for the polys on the head and the template not being equally in size: the ones in the neck are more square and the ones higher up are about twice as long.
To help myself I created an extra layer for the pattern on top of the anti-jags layer (I love separate layers, this way I always keep previous steps intact), plus a top layer. This is a straight copy from the original template, but with all the white masked out so I only see the grey lines from it. Using those grey lines and my sketch, I could whiten out the pattern.
I saved the pattern in a separate Head_Hair_pat (PNG) file, without the grey template lines of course.
Now I have to bring this pattern into Poser.
So in Material Room I give Ryan his head texture back, and I select the head hair from the Props.
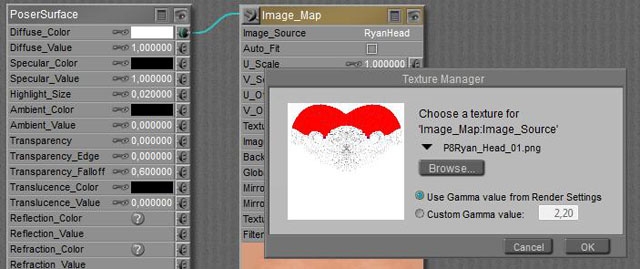
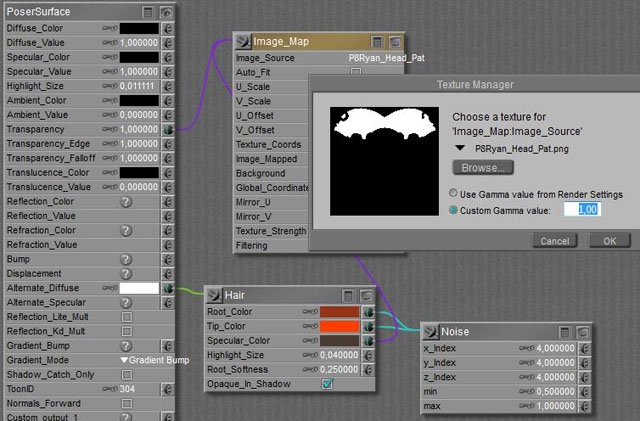
Right click in the area gives me New Node, I pick Image_Map from the 2D textures menu, I pick my saved image as the Image Source in the node – and for those working in PoserPro: I set Custom Gamma value to 1,0 (although it does not matter much, as the image contains black and white only). Now I connect the image map node to Transparency, and I set its value to 1.0. So everywhere the image shows black I get full transparency. That is, when I suppress all edge effects that Poser offers to make neat glasses and bottles. So, Transparance_Edge and Falloff are set to 1.0 as well, otherwise I get some left overs in the shaved are (try for yourself. It’s no too bad for the pattern put it’s awful for the removed jags). This is not enough, because absent hair should not reflect light as well. So I also connect the image map to the Specular Color entry in the Hair node. Now the hair has no specularity any more in those places where the image is black. Now we’ve done this, it’s only a small extra step to the other parts. Growing hair, making, checking and adjusting the template, satisfying those who want a shaving pattern in the beard, playing the colors, etcetera. Note that in the template I did not make a Left/Right difference for brows or mustache. When there is no hair, a white area in the image won’t create it. Only when there is hair, the black area in the image can hide it. The main differences between the various areas, on face as well as chest (same principle to get the jags out), are the settings for hair length, and styling.
| Head | Beard | Chin | Brow L | Brow R | Must L | Must R | Body | |
| Length | 0.0050 | 0.0050 | 0.1000 | 0.0060 | 0.0200 | 0.0400 | ||
| Variance | 0.0000 | 0.0010 | 0.0200 | 0.0010 | 0.0020 | 0.0040 | ||
| Pull Back | 0.00050 | 0.00015 | 0.0005 | 0.0003 | 0.0000 | 0.0000 | ||
| Pull Down | 0.0001 | 0.00005 | 0.0012 | -0.0002 | 0.00005 | 0.00000 | ||
| Pull Side | 0.0000 | 0.00000 | 0.0000 | -0.0005 | +0.0005 | -0.0001 | +0.0001 | 0.0000 |
| Styling | No | 1) | 2) | 3) | 4) | 5) | ||
| Density | 1,000,000 | 1,000,000 | 500,000 | 600,000 | 800,000 | 300,000 | ||
| Tip W | 2.0 | 1.0 | 0.4 | 2.0 | 1.0 | 0.8 | ||
| Root W | 2.0 | 1.0 | 2.0 | 2.0 | 1.0 | 2.0 | ||
| Clumpiness | 0.0 | 0.0 | 0.2 | 0.010 | 0.010 | 0.0 | ||
| K Strength | 1.0 | 1.0 | 3.0 | 0.0 | 2.0 | 0.0 | ||
| K Scale | 4.0 | 10.0 | 100.0 | 1.0 | 10.0 | 1.0 | ||
| K Delay | 0.0 | 0.0 | 0.30 | 0.0 | 0.30 | 0.0 | ||
| Verts | 4 | 20 | 40 | 16 | 20 | 20 |
1) just a bit next to the ears, to correct some Pull effects on specific hairs
2) brought the hairs together, and shortened the hairs at the sides, to make it taper
3) not done but needs some for a detailed finish
4) ditto
5) see notes below
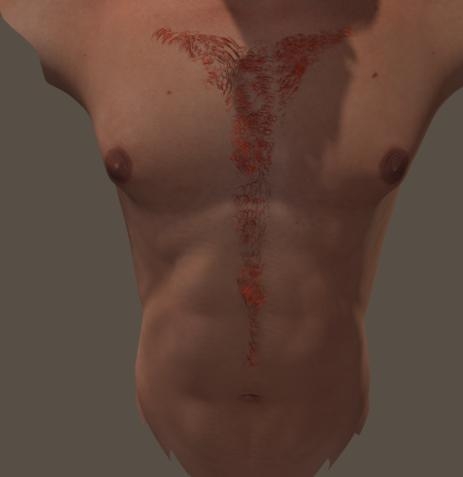
For the body hair, I assigned hair groups to Left and Right Collar, Chest, Abdomen and a piece of the Waist. The two latter parts got shorter hairs, 3 resp 2 cm instead of the 4 cm for the other parts. Then I used the Body template for Ryan to create a neat smooth mask, just to get rid of the jagged edges of the hair group polys. If one wants to shave figures in there: be my guest J. I used thick hair (2mm root, 0.8mm tip) and I found out that I got a neat coverage when I distributed about 300,000 hairs over the total body area (3 large areas of 85,000 plus the rest).
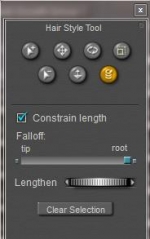
I want a full length twist. So I zeroed all Pull values, opened the [Style hairs…] editor, selected all hairs, set the Falloff to the right (root) so all styling occurs from the root up instead of giving away an unstyled portion, I selected the Twist option and sometimes the Rotate option and moved the cursor left/right or vice versa to give each bodypart about the same amount of twist. There is no indicator or so, there is no recipe, it’s trial, error and clicking [Grow Guide Hairs] in panel 2 to rest all styling on that group.
I switched off Cast Shadows in the hair object properties (real body hair is too thin for that). In general: more hair takes longer renders, and making hair a bit reflective under Indirect Lighting conditions can be a real time killer. More on that in the next hair tutorial.