In real life, a camera consists of an advanced lens system, a diaphragm and shutter mechanism, and an image capturing backplane. The diaphragm (relates to focal blur of Depth of Field), and the shutter speed (relates to Motion Blur or 3D Blur) were discussed already, and the role of the backplane is played by the rendering engine (which will be discussed in other sections of these Missing Manuals).
Something to note when emulating realistic results, is the relationship between things, which is not looked after by Poser itself. Doubling the sensitivity, speed or ISO value of the backplane increases the visibility of noise / grain in the result, and for the same lighting levels in the result it also doubles the shutter speed (is: halves the net opening time), or reduces the diaphragm opening (or: increases the fStop with +1), or reduces the Exposure (in Poser: halves the value, in Vue: reduces with -1.00).
Hence, when I show pictures of a dark alley, people expect more motion blur (longer shutter time) and/or more grain. When I show a racing car or motor cycle at full speed, people expect a shallow depth of field, and grain too. And so on. Poser is not taking care of that. I have to adjust those camera settings and post processing steps myself.
The other way around, portraits and especially landscapes can do with longer exposure times, and will show nearly no grain in the image and hardly any focal blur (infinite depth of field). And most lenses have their ‘soft spot’ (sharpest result) at fS=5.6 (sometimes 4), by the way.
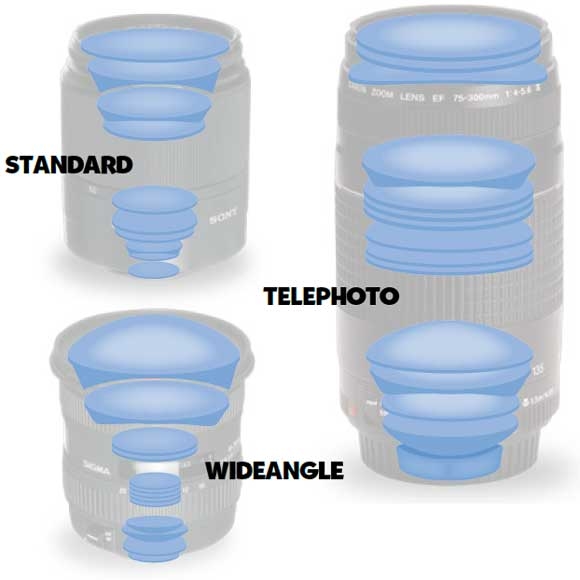
This leaves us with the lens system. In real life a physical thing, with some weight as well. Physical things have imperfections, and these will “add” to the result. Since the lens system sits between the scene and the image capturing backplane, those additions are added on top of the image. In other words, those imperfections can be added in post, on top of the render. Again, the imperfections are required to make a too perfect render look as being captured by a real camera, adding to the photorealism of the image. When you don’t want photorealism, don’t bother at all.
In the first place, the lens system is a tube and therefor it captures less light at the edges. This is called vignetting. A dark edge on the picture, very visible in old photographs. Modern systems on one hand have better, brighter lenses, and on the other hand the lenses are just a bit wider so the vignetting takes place outside the capturing area.
Vignetting is a must – like scratches – on vintage black and whites.Second, the lens system consists of various glass elements. This introduces reflections, either within the element (scattering) or on the elements surfaces. The internal, scattering reflections blur the small bright areas of the image, known as glare. The external reflections generate the series of circles or rings, known as flare. The flare shapes can be pentagonal (5-sides), hexagonal (6-sides) or more to circular, this is determined by the shape of the diaphragm.
|
Glare, the light areas are glowing a bit |
Flare, making rings around the bright spots |
Flares always exist from a very bright light within the scene towards the middle of the image. The more elements are present in the system, the more reflections we’ll see. Note that fixed length lenses have far less elements than flexible zoom systems.
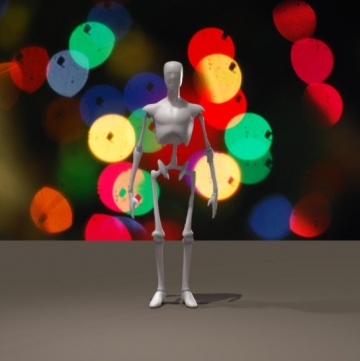
Another effect, called bokeh, appears when a very dark, blurred background contains small strong highlights. While they take the shape of the diaphragm (like flares) they scatter around in the lens system. Normally they would not be visible, but they are since they are quite strong and the background is dark and blurred. While flare usually occurs in shots with no focal blur (or: infinite depth of field, outer space is a typical example), bokeh requires the background blur due to depth of field / focal blur. In most cases there is an object of focus and interest in the foreground. So, one cannot have flare and bokeh in one shot.
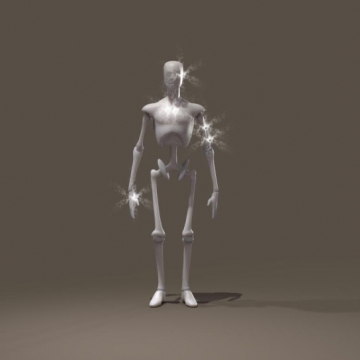
| Bokeh | Star flare |
Third, the diaphragm itself can be the source of distortions: star flare. This usually happens when there are strong highlights in (partially) bright images, where the diaphragm is about closed due to a high fStop number. This tiny hole in the wall refracts light along its edges. A six-piece diaphragm will create a six-pointed star.
Note that the conditions for flare and star-flare contradict: flare needs an open diaphragm due to the dark background (like outer space) while star-flare requires a closed diaphragm due to the bright environment (sun on a winters day). The well-known sci-fi flares (Star Trek), having circular flares ending in a starry twinkle, are explicit fakes for that reason alone. One cannot have both in the same shot.
All these effects can be done in post, after the rendering. Sometimes you need Photoshop for it, perhaps with a special filter or plugin. Vue can do glare and both flares (but not bokeh) as part of the in-program post-rendering process.
Note: some people use flare as a container concept: everything that is causing artifacts due to light shining into the lens directly. Glare, flare, star-flare and bokeh are just varieties of flare to them. No problem, it’s just naming.
