Indirect Lighting, aka IDL, is a computational intensive lighting strategy which can be considered the successor of IBL, Image Based Lighting. The use of it can be switched on/off in Render Settings. The basic principle of IDL is that loads of light rays travel around through the scene, hitting objects, and be re-radiated by those objects again usually with an adjusted color and intensity. This supports ambient lighting, indoor lighting from outdoor sources, radiating objects, radiosity (colors spilling over to neighbor objects) and proper mild shadow levels.
For a start, just a collection of notes and remarks:
- * IDL is a successor of IBL, easier to use but far more computational and memory intensive. So, when IDL is not really working for you in a specific scene or on specific objects, consider re-introducing IBL as an alternative.
- * Like IBL, IDL is working on Diffuse channels only, including Reflection, Refraction, Alternate_Diffuse. It is explicitely not working on Specular (and Alternate_Specular, and any specular material node wherever in the shader tree).
- * IDL lights do not show in preview. As a result of this, and of the previous point, consider to use direct light in the scene with the Diffuse disabled (blackened out). And eventually, with Specularity blackened out too.
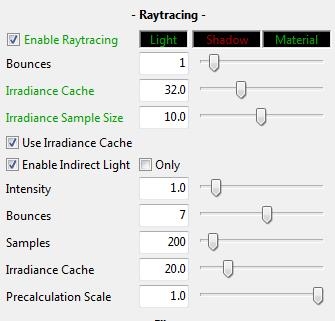
- * IDL renders best (for final results) with Irradiance Caching ON, value at least 80 at most 90, and with IDL ON, Quality at least 80 at most 90. Lower values introduce noticeable splotches all-over the image, and overly dark shadows in self-shadowing areas. Higher values take a lot of time and resources while not adding noticeably to the result.
- * It should be clear then that IDL does require raytracing to be active. This also introduces another mechanism to let the light rays die: when the limit for bounces is met, as set in Render settings, Poser cuts off any further handling of them. This will darken the ambient lighting, might introduce artifacts, and is explicitly meant for speeding up draft renders. Please set Bounces to the max when making your final render.
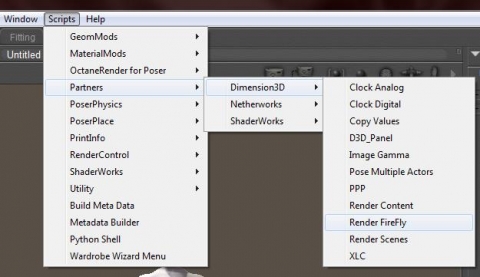
An interesting point is: I can launch the rendering from the Dimension3D menu too, and get access to additional settings. Indirect Light does have its own Bounces and Irradiance Cache, next to the generic ones for AO and reflection / refraction.
- * IDL renders best when the scene is enclosed by a sky dome, walls of a room, or anything alike that traps the light rays and keeps them bouncing around.
- * IBL comes with AO (Ambient Occlusion) to improve on shadowing from ambient, environmental lighting. Any other direct light should have AO switched off. Also, AO should be off under IDL conditions as IDL generates its own shadowing. Again: AO is for IBL only.
- * IDL lighting can be switched off per object, by switching (off) the Light Emitter property of that object. This is worth considering: * for Skin, as Ambient is used sometimes to mimic translucency and subsurface scattering in a fast way, for the older Poser versions. Don’t let your characters be a light source, switch Light Emitter off. * for Hair, as light rays will bounce around forever requiring about infinite render times without adding much to the result. You will then lose the ambient lighting and additional shadowing for that object; it might look a bit flat. Think IBL + AO as an alternative.
- * As the environment is supplying a lot of light, either by bouncing direct light around or by adding light from glowing objects (and especially: all-surrounding sky domes), I need far less lights and far lower intensities compared to non-IDL scenes. As a consequence, all the advanced lighting rigs constructed for non-IDL scenes – emulating environmental lighting with lots of direct lights all around, won’t serve very well any more. All I need is a glowing dome for sky, an infinite light for sun, and perhaps one or two spots for support and flash.
Radiosity
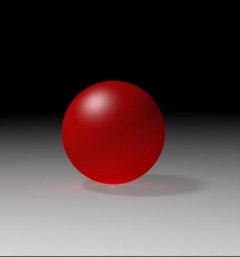
Objects which catch light, re-emit light after merging in their own colors, and reducing intensities. This makes a bright red ball warp a reddish light around, noticeable on white floors etcetera. This is the basic principle of Indirect Lighting and served automatically when this lighting mechanism is enabled. The re-emitted light then is used in all further IDL lighting as well, the light rays either die from energy loss or from being captured by the camera (or by being killed by Poser when Bounces is set low).
Light Emitting Objects
In order to use IDL, I need at least one light emitter which sends out rays. This can be a regular direct light, like point, spot or infinite. Such a light is required anyway for creating specular effects and additional shadowing, but for (diffuse) lighting itself I don’t need direct lights at all.
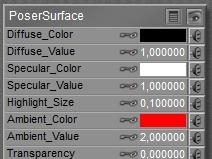
I can make an object glow, by assigning it a high level of Ambient as a material, and it will serve as some lamp immediately. The larger the Ambient_Value, the higher the intensity of the light, the stronger the lamp.
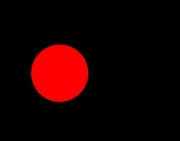
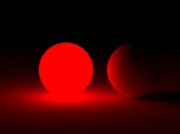
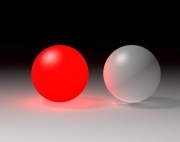
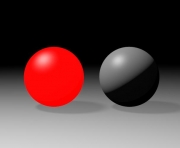
| Two balls, one glowing, IDL off, no direct light | Same scene, IDL on | Same scene, IDL, extra direct light on | Same scene, IDL off |
Note the strong shadows in the rightmost image, which lack in the third where the white floor is bouncing the direct light, reducing the shadows at the lower back/right side of the white ball. The second image shows shadows from the right ball onto the floor caused by the glow/lighting from the red ball at the left, and also demonstrates the lack of specularity (highlights) in IDL lighting.
Sky Domes
IDL works best when the entire scene is embedded in some kind of enclosure, like a box (walls, floor, ceiling for indoor shots. For outdoor shots, the answer is: a sky dome. I could use a normal (hires, half a) ball at a large scale, but dedicated sky domes have even a larger resolution (more polys to reduce smoothing artifacts) and have their normal pointing inward which generally is not the case with regular objects. And I can apply a texture to the dome to obtain the lighting conditions as were, or could be, present in a real life scene. Large shots from landscape generating software, like Vue, serve pretty well here too.
Note that the Diffuse material channel will “reflect” the regular lighting in the scene, and the Ambient channel will make the dome glow by itself. The latter is the usual response to sunlight, scattering through the atmosphere. The sun itself is best represented by an infinite light, within the dome. Then I raise Ambient_Value to get the proper intensity for this generic atmospheric lighting.
When the sky dome is used for color and intensity of the indirect light, scattering all around, the resolution of its texture map is not an issue. But that leaves the question: is the texture on the sky dome fit for purpose as a background image? Usually, it’s not.
Consider a camera at normal lens settings, that’s 35mm focal length and 40° Field of View (see table below), taking a shot (render) of 2000 pixels wide. The full sky dome, being 360° all around, then would require 360/40 = 9 times my view. And good texturing practices require at least double the resolution of my render. So the sky dome should be assigned a 2x 9x 2000 = 36.000 pixels wide texture, at least. Note that Poser takes 8.192 for max texture size, and you know you’re stuck.
Note that the size of the skydome – or any other 360° environment – does not matter. The Field of View matters, as a shorter focal length (typical for landscapes, say 20mm) increases FoV to 60°, and reduces the required texture to a 2x 360/60 x2000 = 24.000 pixels width.
| Focal length (mm) |
10 |
20 |
30 |
35 |
40 |
60 |
90 |
120 |
180 |
| Field of View (°) |
90 |
60 |
45 |
40 |
30 |
22,5 |
16 |
12 |
8 |
So the bets are that you’ll end up with say 8000 pixel wide panoramic image for the skydome, which is too low a resolution for proper background imaging, plus some background image prop holding another 2x 2000 = 4000 pixel wide portion of the high-res version of the panorama just covering the left-to-right edges of the rendered view.
Since this billboard prop might block the skydome lighting considerably (ensure it does not cast shadows, highlights etc) when placed nearby the dome it might need to serve as an active light emitter, the same way the skydome does. When the prop resides at some distance from the dome however this might not be necessary, so you’ll have to test for this a bit.
