Some render engines, called Unbiased or Physics based, mimic the behavior of light and real materials for obtaining their results. There is not much room for tricks or compromises, such engines require loads of resources, heavy machinery and might be slow as well. Other render engines, called Biased, come with bags full of tricks to shortcut the resource requirements while getting reasonable results fast. Poser and Vue offer such biased renderers. Of course they offer maximum quality settings which come as close to the unbiased ones as possible. But it seriously pays off to understand the enormous benefits of a somewhat reduced quality, and a slight deviation from the reality of nature.
So let’s start to discuss the options for the Poser Firefly renderer.
Shadow handling
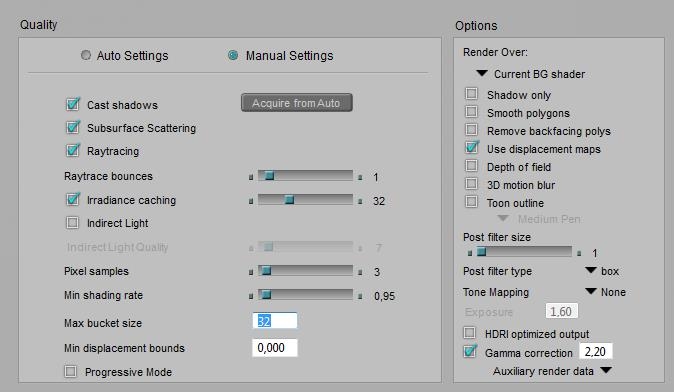
Individual lights can be set to warp shadows, individual objects can be set to cast shadows, but the Cast Shadows option can switch them all off. Or: only when it’s ON, all individual settings are taken into account. By switching OFF, a completely shadowless render result can be produced. This makes sense when the action is combined with a Shadows Only render. This combined action results in two images which can be merged in post, and enables me to set the shadow intensity afterwards. It’s the first step in rendering with passes, as discussed in a separate tutorial on this subject.
A shadowless render also makes sense when calculating shadows takes a lot of time (eg when the scene contains loads of lights), while the shadows are not the issue yet in that specific stage of the project. Then switching OFF Cast Shadows is a time saver.
| Cast shadows \ Shadow only | NO | YES |
| ON | Default, render with shadows | Shadows only pass |
| OFF | No-shadows pass | Empty result, meaningless |
Polygon handling
Individual objects can be set to smooth, but the Smooth Polygons option can switch them all off. Or: only when it’s ON, all individual settings are taken into account. Switching OFF is a time saver at the cost of neat object shapes, which might make sense when precise object shapes are not the issue yet in that specific stage of the project.
Since the Poser renderer is clever enough not to take polys into account that do not contribute to the result anyway, the Remove Backfacing Polys option sounds like a manual override, which it is. Because it also disables the polys which are not facing the camera, but do contribute to the result in other ways. These might play a role in reflection (be visible in a mirror), refraction, indirect light emission, object shape and shadow via displacement, to name a few. Generally checking this option will cause a serious drop in quality while hardly saving rendering time, let alone exceptional scenes rendering on legacy hardware. So this might make sense when temporarily testing your main reflections and the like.
Displacement handling
Objects might use displacement mapping in their materials, but this only takes place when the Use Displacement Maps render option is checked. It details (subdivides) the object mesh and can increase memory requirements enormously. Displacement mapping is a good way of adding detail to objects at intermediate distances from the camera. Objects closer to the camera should have the details modeled in, objects further away can do with bump-mapping alone or – even farther away – without any mapping of this kind.
Displacement mapping might give the renderer some issues to handle, see the Divide & Conquer paragraph below.
Focal and motion blur
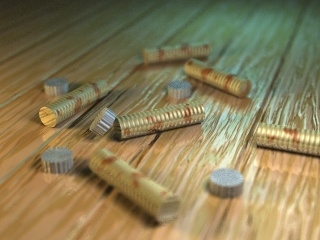
Focal blur, or Depth of Field (DoF) calculations, takes the Focal Distance and fStop diaphragm of the camera into account but does require an extra step in rendering which takes some additional time. Leaving it OFF puts the entire scene in focus, ignores the physical properties of a real-life camera lens, and contributes to the artificial, unrealistic feel of 3D renders. Of course, the DoF effect might be added in post as well.
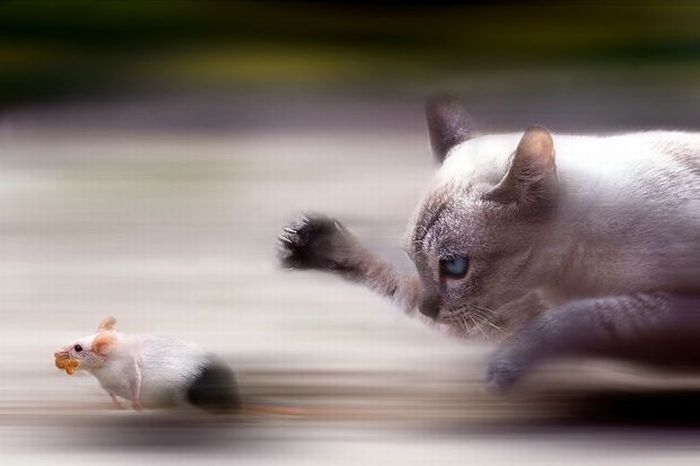
Motion Blur takes the shutter Start and Stop settings of the camera into account, and also introduces an extra step in rendering which takes additional time. Leaving it OFF puts the entire scene in a temporary freeze, suggesting infinite camera speeds or figures that can hold their breath and position for a split second, which by the way might be quite accurate for many situations. Also, switching it ON when the scene contains no animation at all only puts a burden on the rendering process without contributing to the result. On the other hand, do note that outdoor still shots with no blur at all on the tree leaves, grasses and animals around make quite an unnatural impression as well.
Scattering and Raytracing
A relatively new node in materials is the Subsurface Skin node, which adds some translucency effects to a surface as is present in muddy waters, human skin and waxy candles. It requires an extra render preparation pass, which is performed when a) such material nodes are present in the scene and b) the Subsurface Scattering option is checked. So, unchecking the option is meant for speeding up draft renders of scenes with scattering-intensive surfaces.
Raytracing addresses reflection and refraction of the actual surrounding objects by a surface, each pass or reflection of/onto a surface is called a “bounce”. Raytracing does not handle direct lights, does not handle scattering and does not handle reflection maps, but requires explicit reflection and refraction nodes in the material. When the Raytrace option is switched OFF those nodes are ignored, which is meant for speeding up draft renders of scenes with raytracing-intensive surfaces.
Note: using lights with raytraced shadows, and Indirect Lighting techniques also require Raytracing to be switched ON in Render Settings.
Each time a light ray bounces (reflects or passes a surface) it loses a bit of its energy, so it gradually fades out and dies. In real life, the number of bounces a light ray can make is quite large, and infinite in theory. To speed up (test) rendering in very bounce-intensive scenes (like a shiny car in the midst of glass and mirrors in an automotive commercial), I can set an upper limit to the Bounces. Poser will cut off the tracing of that ray when that limit is met, and of course this can introduce artifacts, black holes in the resulting render.
For final renders, the highest value is the best. It comes closest to nature’s behavior. It’s an upper limit for cut-off, so when no ray makes more than 3 bounces anyway, raising the value from 6 to 12 won’t make difference at all. You’re not forcing Poser into unnecessary raytracing, you’re just reducing artifacts, if any.
Indirect lighting
Caching
Irradiance caching is a technique which speeds up the calculations for Indirect Lighting (IDL) as well as self shadowing, or Ambient Occlusion (AO). A low setting implies a low number of samples taken from the scene (it’s a percentage, 0-100%). The colors, shadows and lighting levels for intermediate points are interpolated from them. This is faster, and less accurate. A high setting implies a more accurate result, at quite longer calculation times. For very high settings it might be better to turn off the mechanism completely to avoid the additional overhead of saving intermediate points and interpolating: just uncheck the option at all.
What are good values then? Well, have a look at the Auto-settings: values below 60 are not even suggested, which means Poser samples about every other point (just over 50%) for an initial draft result. Final renders take values up to 100, while any value over 95 could be better replaced by switching off the caching at all. Nature does not cache irradiance, so why should we?
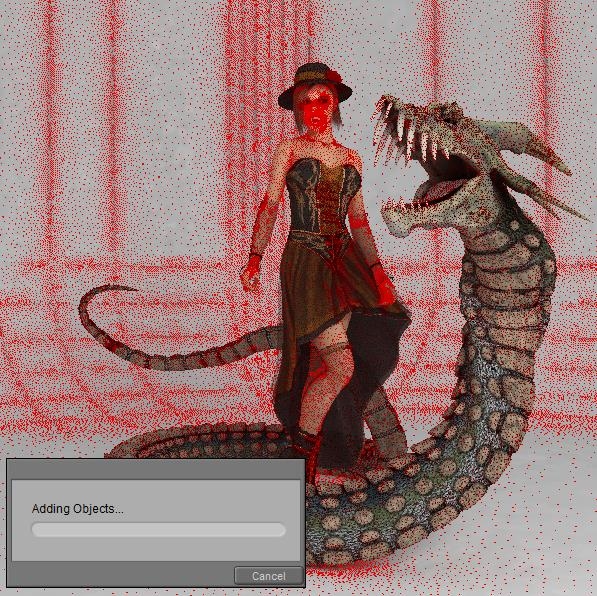
During the IDL pre-pass, red dots in the scene reveal the Irradiance caching.
When the density is too low, the value can be increased, and vice versa. When the option is switched OFF, the caching / red dots substep is skipped and the IDL is calculated directly, for all relevant points in the scene.Lighting
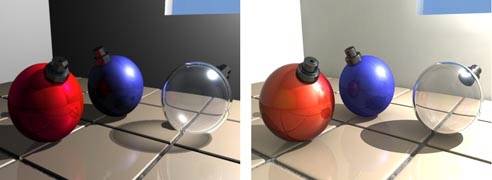
Indirect lighting (IDL) turns objects into light sources. Either because they bounce direct (and other indirect) light back into the scene, changing its color and intensity. Or because they emit light themselves, due to very high settings (> 1) of their Ambient material channel. The method mimics natural lighting methods at their best, but requires an additional – time and resource consuming – rendering pass. Unchecking the option speeds up draft renders, but you lose the lighting as a consequence.
Indirect Lighting requires raytracing to be switched on, and the Bounces setting is taken into account as well. A low Bounces setting make the light rays die quickly, resulting in lower lighting levels, especially in indoor scenes lit from the outside. Here again, the highest setting is the most natural but will lengthen rendering time. Also, Irradiance caching is taken into account: lower values render faster but use interpolated results instead of accurate ones.
Irradiance caching arranges for the ratio between determined and interpolated rays, but does not set the amount of them (or density, per render area). This is done with the Indirect Light Quality slider, higher values make more rays shot into the scene for IDL, with longer render (that is: IDL pre-pass) times accordingly. It’s a percentage (0..100%) of something. For final renders, one could say: just set 100 for quality. This certainly might hold for large stills. On the other hand, slightly lower values render much faster without reducing image quality that much.
Speed vs Quality
So I did some additional research, rendering a scene with various settings for Irradiance Caching as well as IDL Quality. My findings are:
- * When either Irradiance Caching or IDL Quality is set below 80, the result shows splotches, while AO-sensitive areas (near hair, head/hat edge, skirt/leg edge, …) get too less light and produce darker shadows. These effects are noticeable for my eyes, I can tell them without knowing beforehand where they will show up in the result, and especially the splotches create low-quality impressions.
- * When IDL Quality is increased, rendertime only gradually increases while the splotches disappear. So this is some low coast / high result kind of improvement. Until the value exceeds 90, then the improvements are not really noticeable anymore.
- * When Irradiance Caching is increased, rendertime goes up fast, and say doubles till 90 is reached, and quadruples or worse when values get even higher. The main effect is on the quality of the (self)shadows in the AO sensitive areas, which I consider not the most relevant. So this is a high cost / low result kind of improvement, but for values up till 85 it also contributes to the splotch reduction.
So my preferred settings are 80 and up for both Irradiance Caching and IDL Quality, in any case. I tend to set IDL Quality to 90, and Irradiance Caching to 85 increasing to 90 depending on my findings in the specific render results.
The shorter render times can be relevant, especially when producing animated sequences. The best settings depend on the scene and require some experiments with a few frames, before rendering out the complete sequence.
Tips & Tricks
The Poser manual present some tips for handing IDL effectively.
- * IDL means light bouncing around, and performs best when the scene is encapsulated within some dome, or room, or enclosure. Especially the SkyDome might offer self-lighting as well.
- * Reduce the amount and intensity of (direct) lights, especially under SkyDome lighting conditions. One main light and one support light might be sufficient.
- * Smearing indicates the IDL is short of detail, so increase Irradiance Caching. Watch the red-dots prepass.
- * Splotchiness indicates the IDL takes too many samples, so reduce Irradiance Caching and increase Indirect Light Quality for compensation
- * Use Raytraced shadows instead of shadow maps, increase Blur Radius to say 10 (and shadow samples to 100, I like to keep the 1:10 ration intact).
- * Ensure Normals Forward is checked for all materials (this is the case by default, but anyway)
- * When using IDL in animations, render all frames in the same thread on the same machine. As said in the manual. Apparently, some random sampling and light distribution takes place when rendering, and this random process is seeded by thread and machine ID for various good reasons (as in: to avoid apparent pattern tiling and repetition within the render result). Unfortunately, multi-threading and multi-machine network rendering are essential for producing animations. So actually, the manual says: do not use IDL for animations. That’s a pitty, isn’t it? So I suggest to experiment with the settings, raise the Quality, consider to switch off Irradiance Caching (that eliminates at least one IDL related random sampling process, although it might be a rendertime killer), and evaluate some intermediate test runs. Things might be not that bad after all.
Some additional tips from my own experience:
- * Direct lights with inverse linear attenuation, and especially with inverse square attenuation, can create hotspots when put close to a wall, ceiling or other object. Those hotspots propagate through the scene presenting “light splotches” all around. Increasing Indirect Light Quality, raising (or unchecking) Irradiance Caching and taking light absorbing measures around the lights are some ways to go.
- * Sources of indirect light, being too small or placed too far away from the relevant objects in the scene, will produce lighting levels which are too low. This can present “shadow splotches” all around. Using large light sources nearby the object, and using direct lights instead, are ways to go.
- * Indirect Light works on Ambient and Diffuse only, and produces a serious amount of all-around ambient lighting, including Ambient Occlusion. But it does not work on Specularity, and it’s not very good in producing specific, determined shadows from objects. Using direct lights for those specific purposes instead is the way to go. As is “photography is painting with light and shadow”, IDL is a mighty tool for painting with light. For painting with shadow, use direct lights instead.
- * Lots of objects are completely irrelevant for bouncing indirect light around, they will not illuminate neighboring objects anyway. Test unchecking the Light Emitter option for those objects. Especially check on
- * Skin. In various material settings, some ambient is added to mimic translucency (subsurface sampling) in older versions of Poser or to speed up the rendering. As a result, the skin will act as a light source under IDL. Switch it off.
- * Hair. Lightrays can bounce around forever; it takes loads of time and resources, and accomplishes nothing. Switch it off, to speed up the IDL pre-pass. However, taking those surfaces out of the IDL loop might produce flat, dull results. In this case one either has to take the long render-times for granted, or one has to seek additional measures like adding in some extra AO for depth somehow.
