The Cloth Room and the Hair Room do have some similarities. The layout of the user interface, with four panels, panel 1 defining the sim and panel 4 defining the dynamic parameters and starting the calculations. The presentation and organization of the panels by the way depends on the size of my screen. On a 1280×800 laptop I might miss the extra panel with various buttons, and the panels are in two columns 1+2 and 3+4. On a 1280×1024 desktop it’s completely different.
Panel 1. Growth Group
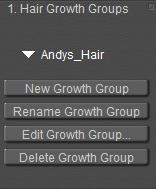
A Hair Sim is called a “Growth Group”. [New] adds a sim to the list of sims, [Delete] takes it out. The name of the group is the only parameter at this level, so we’ve got [Rename] to alter the setting(s). The little triangle presents the list of Hair Sims to pick from, and shows the selected one. [Edit] opens the Poser group editor in polygon mode. It requires either a prop or a figure and one of its body parts selected in preview, and from that prop or body part poly’s can be selected into the group. Applying the Smooth Lined or Flat Lined mode in preview helps selecting.
If no figure and body part are selected, Hair Room turns inactive, I can’t even create a New Group then. As far as Hair Room is concerned I cannot make a New Group for a Body (but: parts only), but I can try to make a group for a Camera. However, Cameras don’t have polygons so no group will be made effectively, but no message will tell me.
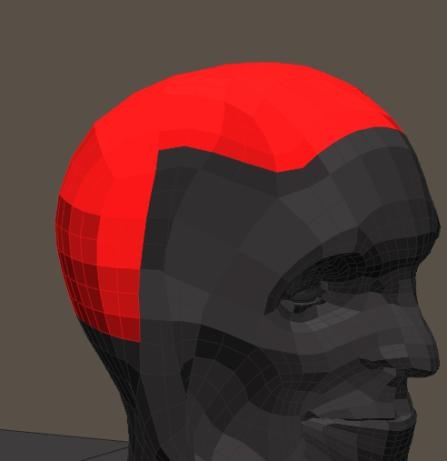
Let’s stay on track, and select part of Andy’s skull into the hair group. This will have the following effects:
- A group with the appointed name is added to Andy. This implies that those polys are in the Head group as well as in the Andys_Hair group. I can separate those polys, turn them into a prop using the Group Editor, and save them with all the hair settings into the hair section of the Library.
- A prop with the appointed name is added to the scene too, but this prop only contains the hairs which I’m going to define. Of course this prop is parented to the head.
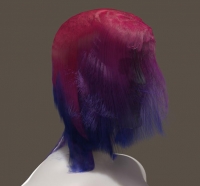
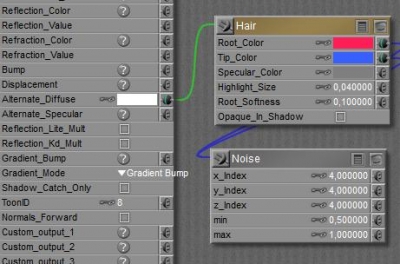
- Those hairs get a material assigned as well: a neat Hair node plus some noise plugging into Alt_Diffuse.
| Default | Blonde | Brown | Red | Black | Grey | Grass | |
| Root color* | RGB 165/151/110 HSV 30/56/129 |
Default | HSV 10/90/50 | HSV 5/160/80 | HSV 0/0/0 | HSV 0/0/80 | HSV 75/220/50 |
| Tip color * | RGB 236/217/158 HSV 30/161/185 |
Default | HSV 10/90/80 | HSV 5/160/100 | HSV 0/0/30 | HSV 0/0/200 | HSV 75/220/70 |
| Specular | 50% grey | 20% | 15% | 25% | 20% | 30% | 50% |
| Highlight | 0.04 | 0.1 | 0.1 | 0.1 | 0.1 | 0.075 | 0.05 |
| Root Softness | 0.1 | 0.1 | 0.1 | 0.1 | 0.1 | 0,1 | < 0.1 |
| Opaque in shadow | NO | YES | YES | YES | YES | YES | YES |
* Poser HSV has a max of (240,240,240) and is used here, Photoshop HSV has a max of (360,100,100) and the parameters have a different meaning.
In Poser, full color is (any,240,120). In Photoshop, full color is (any,100,100).
Later on I’ll point out why having a single Growth Group for all the hair is not very handy. It’s generic practice to turn the selected part of Andys head into a “SkullCap” prop first, and to define several portions thereof as separate Growth Groups. Common portions are: Side left, Side right, Back, Top left and Top right.
Then this entire SkullCap can be saved into the Libraries Hair section. Recommended. This makes me end up with multiple sims, which I can recalculate one by one, or all in one using the menu: Animation > recalculate Dynamics > All hair.
Panel 2. Growth Controls
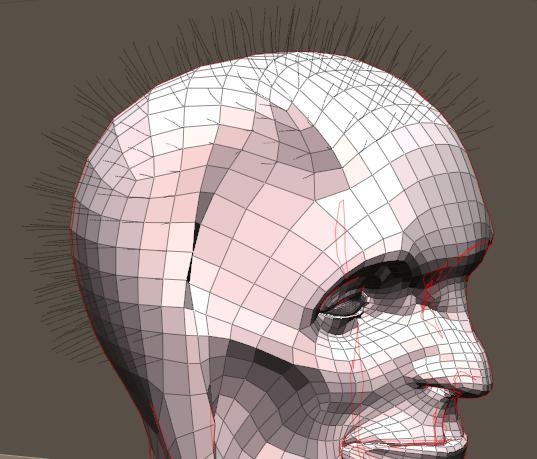
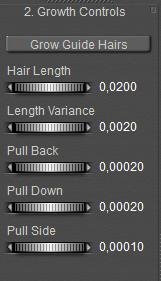
Next the selected Growth Group can be populated, I just [Grow Guide Hairs] and each vertex in the group grows one. When I like more guide hairs for more detail in the coupe, I have to refine the Skullcaps mesh density in a 3D editor.
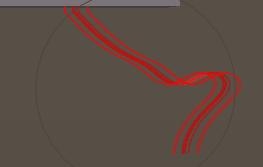
A Guide Hair can be shaped etcetera, and then works as an example for surrounding generated “populated” hairs. This way I don’t have to model each hair individually while still having good control over the details.
The general definition holds for all those guide hairs; each time I change a value the preview gets updated, I don’t have to click the [Grow…] button every time.
Hair Length and Length Variance are in my own Poser units, so if my Poser is set to present them in meters, then 0.02 means: 2 cm. If I set them accordingly and change my units preference to inches, I’ll find the Length setting altered to 0.78 (after re-entering Hair Room or re-selecting Andy’s head).
Note that variance is absolute, so Length= 0.10 and Variance=0.05 creates hairs between 5 and 15 cm, but reducing Length to 0.01 creates hairs between -4 and +6 cm. I don’t think negative hairs grow inwards, but you’ll never know. So: don’t let your Variance exceed your Length setting.
The Pull parameters define the curvature of the hairs relative to the local (skull) coordinates. That is:
- Pull Back affects the hairs aside and on top, but not at the back as these were pointing backwards already (minus Z direction)
- Pull Down similarly will not affect eventual hairs under the chin, as a beard grows downwards (minus Y)
- Pull Side does affect all hairs.
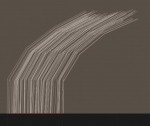
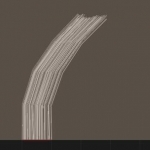
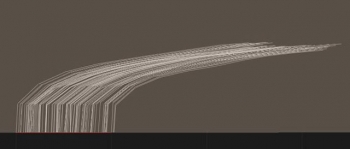
Note that this is the “natural” curvature preliminary to all further styling and dynamic effects like gravity and wind. The effects of these Pull parameters are related to the Hair Length, and to the amount of Verts per hair. In order to bend a 20cm hair fully backwards I need a ten times larger Pull Back value than for a 2cm hair. The other way around; short hair takes very small Pull values to show a considerable effect.
| Length=0.1, Verts=5 | Double length | Double Verts |
Panel 3. Styling Controls
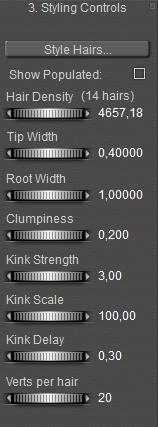
Panel 3 presents some generic detailed settings, plus an advanced styling editor (click: [Style Hairs..]).
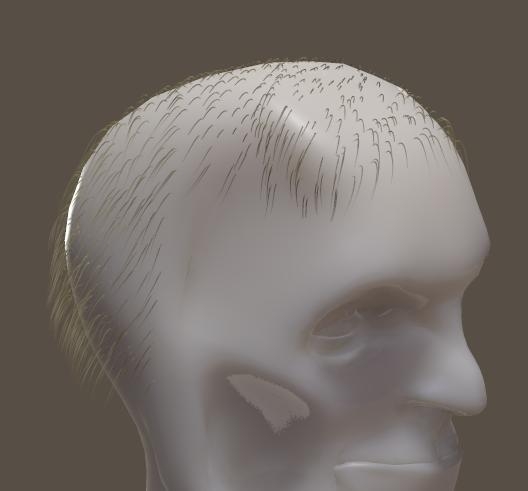
Hair Density controls the total amount of hairs, or: the amount of populated (and rendered) hairs per guide hair. Since showing all hairs can delay the preview, this can be turned OFF. Firefly renders will always show all hair, this option is preview only. Hair Density shows two numbers, the bright one next to the dial states the amount of hairs per square user unit. The default is 32,000 hairs per square PNU (Poser Native Unit = 8.6ft = 262cm) which is the equivalent of 4657 hairs per m2 or 3.0 hairs per inch2. So when various groups have matching hair growth, this number must be the same. The dimmed number between parentheses shows the amount of hairs that will be generated onto the hair growth area.
Hair thickness is controlled by Tip and Root Width. Hair will get thinner at the ends over time, so regular haircuts will leave thicker tips compared to long hair which sees a comb or brush only. Blonde human hair is thinner at higher density, black is thick with medium density, brown is medium thickness/medium density and red is medium thickness, low density. Animal hair is thick and dense, although most animals have an undercoat of short fine hair and an “overcoat” of thick longer hair.
| Default | Blonde | Brown | Red | Black | Animal | Grass | |
| Density | 0.45/cm2 | 300/cm2 | 200/cm2 | 150/cm2 | 200/cm2 | 100/cm2 | 4 / cm2 |
| Head / 500cm2 | 235 | 150,000 | 100,000 | 75,000 | 100,000 | 400,000 *) | 400,000 ** |
| Thickness | 1.0 (mm) | 0.05 | 0.10 | 0.10 | 0.20 | 0.50 | 2.0 |
| Tip – worn long | 0.4 | 0.03 | 0.05 | 0.04 | 0.06 | 0.01 | 0.2 |
| Tip – worn short | 0.4 | 0.04 | 0.07 | 0.06 | 0.12 | 0.1 | 1.0 |
| Tip – haircut –long | 0.04 | 0.08 | 0.08 | 0.16 | |||
| Tip – haircut –short | 0.05 | 0.09 | 0.09 | 0.18 |
*) for a medium size dog (Labrador) which measures say 4000cm2 in total. A small dog (Lab puppy) or a large cat measures say 2000cm2, a tiny cat say 1000cm2, a mouse say 20cm2.
**) for 10m2 grass area, as around a picknick table
Hair grows at a rate of 1 cm/month and lasts 30 to 60 months, so hair longer that 60 cm is exceptional. With on the average 100,000 hairs, lasting say 50 months, one loses / creates about 2000 hairs a month = 70 per day. Trivia.
In cases of straight (non-curly) short hair, animal skin, fur coats, grass etc this might be it. Hair like that has no dynamic behavior on wind and gravity, and can simply be used as is. With the Pull values, the density and the thickness and perhaps some additional styling for separate guide hairs (see: Hair Editor) the job can be considered done.
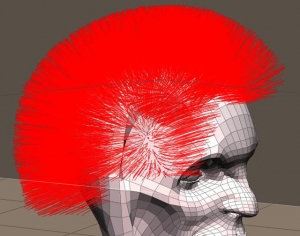
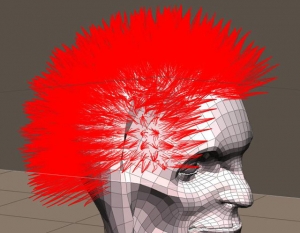
Clumpiness concentrates the populated hairs around the guide hair and make the hairs grow towards each other (figure, clumpiness=0 and 1)
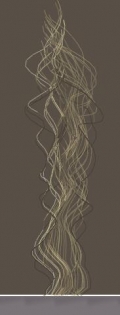
The Kink parameters define wave and curl. How much (Strength, amplitude, 10=very mild, 100=rather present, 1000=all over the place), how large (Scale, frequency. The higher, the more waves I get. 10=mild, 100=rather present, 1000=frizzy. Minimum 1) and where it starts away from the root (Delay – so the first part is straight, and curls can start at ears height or so. In %, so 90 will make the last 10% curly).
| Default | Strength 3 => 30 | Scale 100 => 30 | Delay 0.3 => 0.6 | Verts/hair 50 => 5 |
Since each hair is a 3D mesh, low resolutions can hamper any detailed shaping. Verts per hair (from 4 to 100) can affect that. For a hair of 20 cm, 20 verts imply edges of 1cm between them. This is the body resolution of Android Andy, Vicky4 goes twofold (5mm). I guess that good hair should about equal the body density, which implies that 20cm hair requires 20 to 40 verts. I would double it in a close-up head portrait.
In the meantime, all hairs in the entire group are still treated similar. So:
- Question: can I make hair shaving patterns?
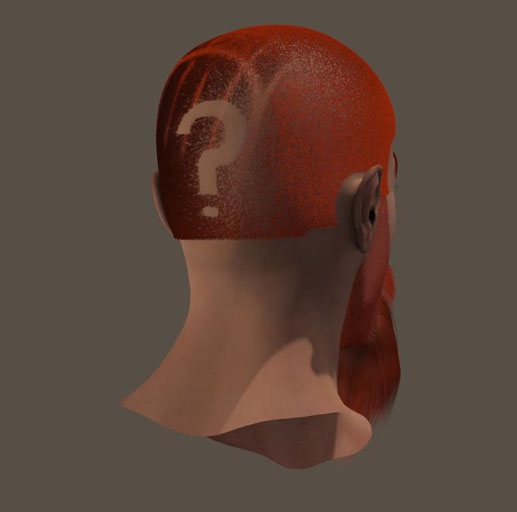
Not as such, as it requires some image map to do so and the hair length is not image-map driven. Also, the concept of guide hairs that pass all their properties to populated hairs does not support the “shaving patterns” idea very well. But for short hair (which is always required to shave patterns) it might pay off to experiment with some image mapping in the Materials Room. Portions of hair can be made transparent then. - Question: can I make color patterns?
Same as the above: it must be done in the Material Room, where root and tip colors can be made image-map driven. See the Case Study. - Question: can I vary the hair length?
Well, a single SkullCap can consist of various Growth Groups, each having its own hair length setting. Next to that, each individual Guide Hair can get its own length from the Hair Editor.
Hair Editor
One major warning beforehand. The Hair Editor sets properties for individual guide hairs. All the settings (for the Growth Group at hand) will get lost the moment any change is made, dial is touched or value field is opened, in the generic Guide Hair settings in panel 2. This, by the way, is the only way to reset any settings from the Hair Editor.
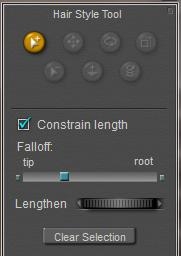
During the edit, a hair root will keep its place – and direction, as set with the Pull parameters in panel 2. So, selections are marked by the tips, and moving, rotating, twisting and so on affect the tips. That is: a portion from the tip towards the root as set by the slider underneath. Whether or not an operation also lengthens or shortens the hair, or keeps the hair length intact, can be switched on/off. Again, lengthening etc starts halfway the hair, according to the tip/root slider. Except for the Length dial, which affects the whole hair. All hairs can be dealt with individually.
Note that each guide hair represents a population of hairs around it, all those hairs will present themselves the same way. Details from twisting, lengthening nuances etc might get lost in the crowd.
And again: to un-style all hairs, I just have to click [Grow Guide Hairs] or to touch anything else in panel 2 and I’ll get new ones according to the settings in panel 2 and 3. I’ve found no way to un-style individual hairs, or selections.
Panel 4. Dynamic Controls
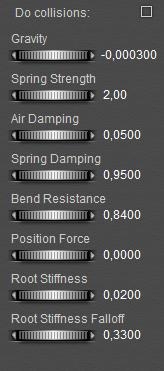
After growing and styling Andys hair I can expose it to gravity and wind, using the [Calculate Dynamics] button, and [Clear Dynamics] when I don’t like the outcome. I have noted that the calculation adds some draping frames itself, then takes the whole and nothing but the whole animation range, does not present any frame-timing in the progress meter and does not always respond very well to the Cancel button.
Do Collisions is worthwhile to check, also checking Collisions in the properties of the objects around the hair (like the head) is not only necessary but also present a performance killer: calculation times go up drastically. So I do my test runs with this option unchecked, and check it on when my satisfaction has gone up enough. Checking the option by the way only makes sense when there is something to collide, which is not the case for short hair and alike.
Next I’ll discuss the individual parameters, with their respective default. There is no [Reset] button to call in those defaults after playing around. Compared to Cloth Room, none of the Hair Room parameters makes real sense in a physical way, and none of them is properly testable either. I tried, putting a flag of hair in the stream of the wind generator. It did not produce workable results.
Gravity (-0.0003). As hair is organic its specific weight can be estimated at 1 gram/cm3, which translates to 0.0003 gram per cm of hair with an average radius of 1mm. Which is according to the defaults in panel 3, but quite a lot compared to nature. Ten- to hundredfold too high actually, as 0.1mm might be a better radius for real hair. However, -0.00003 (one magnitude down) fails to get the hair down properly, and -0.003 (one magnitude up) drags down the hair so much that most styling gets lost.
Blonde hair can be quite less (half), black hair needs more (double).
But I have to make the changes and adjustments myself, as altering the parameters (like Length, or Density) does not change the effect of wind on the hair.
My guideline: the ratio Air Damping : Gravity is 170 for the default (Brown hair). Blonde hair (thinner, more hairs per cm2) has a higher ratio, up to 300, Black hair a lower ratio thanks to a higher weight (120) Red hair lower also (150) due to less hairs per cm2.
Spring Strength (2.0) & Spring Damping (0.95). The Damping is assumed to reduce the bouncing of the hair, and so it does indeed. The Strength itself is a dubious parameter. The manual is plain weird: increasing the value should increase the springiness of the hair. And the Damping should affect the elasticity. Tell me the difference.
Anyway, I don’t see any real effects, nor in result, nor in the generated animation, between 0.2, 2.0 or 20.0 for the Strength. At least the “springiness” helps to drape and settle the hair. I tend to leave these values as they are.
Bend Resistance (0.84) is the inability of a hair to bend along its length. This appears to be a very relevant one. At 1.0 it turns the sim into a complete freeze-up. At 0.1 the hair – and especially the generated animation – is very wavy, and in the wind it turns into a complete mess. For long hair (50cm) I even found locked movements at values as low as 0.75 and an unmanageable waviness at 0.50. There are no values from physics books, so it’s trial and error in this department.
That’s why I usually check OFF the collisions in my first test runs, as I need a lot of them. Test runs, that is.
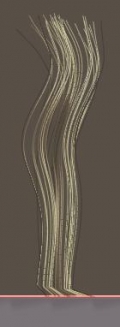
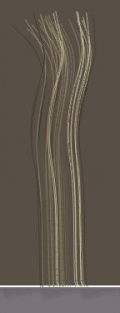
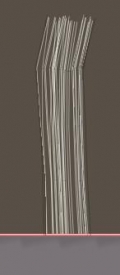
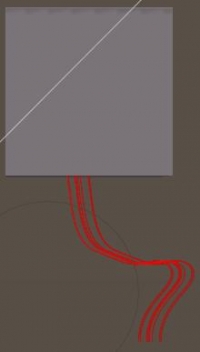
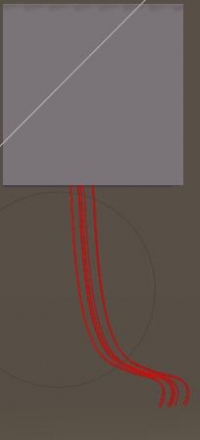
Root Stiffness (0.02) & Root Stiffness Falloff (0.33). The Stiffness takes up the Hair Root characteristics as the Pull values set in panel 2, to the specified extent. The rest is taken by the other dynamic characteristics. And the Falloff tells for which part of the hair, so 0.33 takes it for the first third from the root, and 1 (aka 100%) locks the hair completely: the hair becomes stiff from the root to the tip.
| Default
|
Stiffness 0.02 => 0.2 | Falloff 0.33 =. 0.70 |
|
|
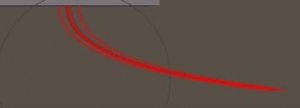
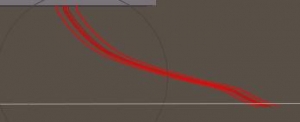
Position Force (0.0) determines to what extend the hair tends to stick in the start position, where it was styled into. Like hairspray, the more you use the less gravity and wind will have effect on your hair.
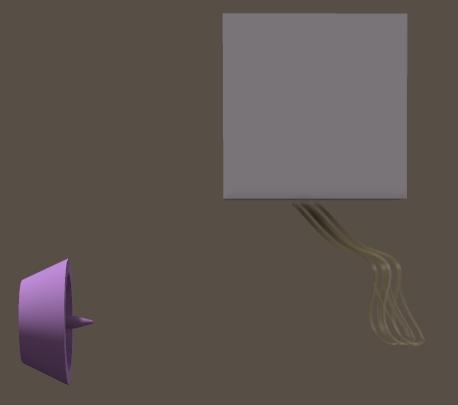
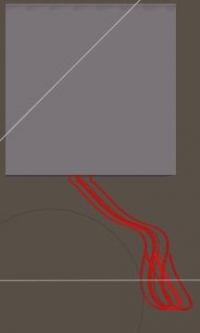
Let’s test it using a serious (0.001) Pull Side. A serious Position Force (0.03) keeps the hair into position during simulation. A reduced value (0.01) relaxed this a bit, a further reduced value (0.001) freed the hair bundle completely.
| Blonde | Brown | Red | Black | |
| Gravity | -0.00015 | -0.0003 | -0.0003 | -0.0006 |
| Spring Strength | 1 | 1 | 1 | 1 |
| Air Damping | 0.045 | 0.051 | 0.045 | 0.072 |
| Spring Damping | 1 | 1 | 1 | 1 |
| Bend Resistance | 0.6 | 0.6 | 0.6 | 0.6 |
| Position Force | tbd | tbd | tbd | tbd |
| Root Stiffness | 0.1 – 0.01 | 0.1 | 0.1 | 0.1 |
| Root St Falloff | 0.01 | 0.03 | 0.02 | 0.04 |
Last Words
Compared to Cloth Room, Hair Room presents a wealth of simplicity. Each sim addresses one well determined set of polys, guide hairs are determined by mesh density, and actually are the only elements that are manipulated in panels 2, 3 and 4. There is no way to convert conforming hair into dynamic, poke-through is no issue for hair and collision is checked on/off in Pose Room itself. So sims hardly go wild or crash unless I take the wrong set of parameters myself. They only might take time when there are many collisions involved.
Since there is nothing to convert, I either can load an existing dynamic hair object (and adjust it) or create one myself. And as I have to set all parameters myself as well, problems and bad results are either to blame on the toolkit – which is not going to change lightly – or on my own lack of experience to handle it. That is something I can change, but not by reading more on principles and theory.
This is where the Case Studies kick in. Which is where hair materials are discussed as well.
