From the Simple interface to Material Room, there is no real difference between assigning a still image, or a movie. So, consult the article on images first, and when selecting a file via Texture Manager, just select the appropriate movie file. Various formats are supported, somewhat depending on the Operating System and on the video codecs installed.
Intermediate
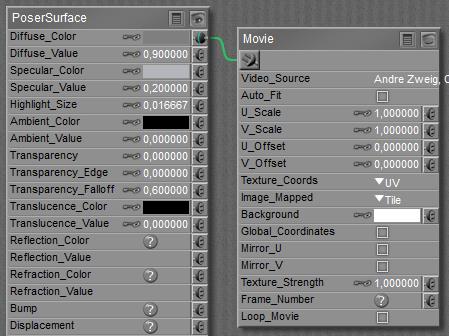 In the Advanced interface to the Poser Material Room, nodes are the essential building blocks. They are the graphical representation of mathematical function calls, calculation procedures turning parameters (inputs) to a result (output). For applying movies, the Movie node can be found in the 2D Textures group, and reads like …
Note: when a still image is assigned via the Simple interface, switching to Advanced will show an Image_map node attached. When via the Simple interface a movie file is assigned instead, switching to Advanced will show a Movie node.
When comparing the Movie and Image_Map nodes, I’ll notice that most parameters are similar. But the Movie node lacks filtering, as ‘None’ out of these is applied. And movies do have frames, like my animation. Without any further steps, both are just matched so frame 1 from the movie will be applied in frame 1 of my render, and so on. But the node offers the possibility to add some math into it, so I can let the movie run faster, or start ahead, of the rendered animation. As in
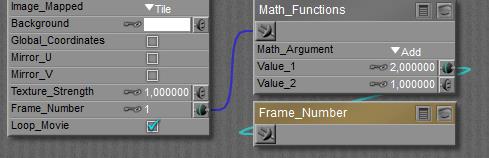
Where (Movie Frame) = 1* (2 * Scene Frame + 1)
As can be expected, Frame_Number in the Movie node refers to the frame in the movie, while the Frame_Number node itself (from the Variables group) refers to the rendered frame in the scene. And when the Movie is not long enough to deliver the required frame, it can start all over again. But that requires that the Loop_Movie checkbox is ON. Which it is by default.